


74 SuperScript 4650 Series — User’s Guide
6. Press Menu, then Online.
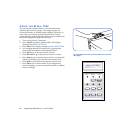
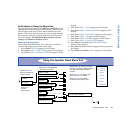
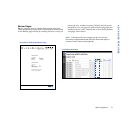
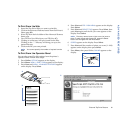
Printing Information Pages
You can print a number of different pages preformatted with
useful information about your printer. Follow these steps.
1. Press Online. OFFLINE appears on the display.
2. Press Menu. MENU - PRINT FORM appears on the display.
3. Press Select.
4. Press Next until you see the page you want to print. Your
choices are, DEMO PAGE 1, DEMO PAGE 2, PS START
PAGE, PS FONT PAGE, MENU TREE PAGE,
and SUPPLY
ORDER.
5. Press Select. The chosen page will print.
6. Press Menu, then Online.
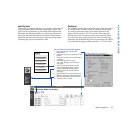
Resetting Usage Reports
You should reset the Usage Status any time you replace the
Belt Cartridge, Fuser Cleaning Roller, or Fuser Unit. Follow
these steps. The example below shows how to reset the Usage
Report when you replace the Fuser Unit.
1. Press Online. OFFLINE appears on the display.
2. Press Menu until MENU - USAGE STATUS appears on the
display.
3. Press Select.
4. Press Next until REPLACE FUSER appears on the display.
5. Press Select, and when the panel displays CONFIRM,
press Select again.
6. Press Menu, then Online.
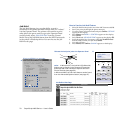
TCP/IP Setup
You can use the Operator Panel to enable and set up the
TCP/IP networking parameters for the printer. This is
particularly useful for setting the printer’s IP address so you
can use it as the printer’s URL in web-based printing. Follow
these steps.
1. Press the Online button of the Operator Panel. OFFLINE
appears on the display.
2. Press the Menu button to enter menu mode. MENU -
PRINT FORM
appears on the display.
3. Press the Next button until MENU - COMMUNICATIONS
appears on the display, and press the Select button.
4. Press the Next button until NETWORK appears on the
display, and press the Select button.
5. Press the Next button until TCP/IP appears on the display,
and press the Select button.
6. Press the Next button until NET ADDRESS appears on the
display, and press the Select button.
7. Use the Operator Panel buttons to set values for each of
the 12 digits in this manner.
First press Next to set the curser to the first digit.
For the first digit, press Select to increment to the correct
value. Then press Next to move to the next digit and
press Select to increment to its correct value. Continue
until all twelve digits are set. When the final digit is set,
press Next to confirm the Net Address you set and then
press Select.
8. Press Menu to exit menu mode and press Online to
bring the printer online.
SUBNET MASK, and GATEWAY are set in the same way. If you
select ENABLE, the TCP/IP protocol is enabled.
To validate any changes to network settings, you must turn
the printer off, and then on again.
For more information about networking the 4650 Series
printer, see the SuperScript Color Laser Network Guide.