


22 SuperScript 4650 Series — User’s Guide
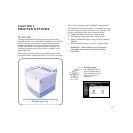
PRINTING WITH THE 4650 SERIES
P
RINTER
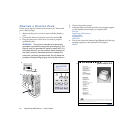
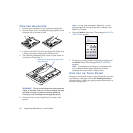
After you have successfully printed a Startup Page and
connected your printer, you can install a printer driver from
the SuperScript 4650 Series CD and begin printing.
There are three available setups for SuperScript 4650 Series
printer software: Easy/Local, Network Client/Custom, and
Network Server/Administrator. These were described earlier
on page 3 of this user’s guide.
note: Instructions for setup and printing from a Mac OS
are on page 48. See also the “SuperScript Color Laser
Network Guide.”
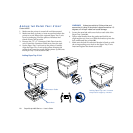
To get started, you can use the Easy/Local setup. This setup
quickly installs the basic printing tools for your operating
system.
Local Setup for Windows 95/98/NT 4.0/2000
Follow these steps.
1. Insert the SuperScript 4650 Series CD into the CD-ROM
drive.
2. The Installer will launch automatically. You will be asked
to choose your printer model: SuperScript 4650, 4650N,
4650NX.
3. When prompted, select the Easy/Local installation option
and click Next.
4. Continue responding to the selections displayed in the
dialog boxes until installation is complete.
PostScript Driver Setup for Windows 3.1x
Follow these steps to install and use the PostScript printer
driver in Windows 3.1x.
1. Boot your system and start Windows.
2. Insert the SuperScript 4650 Series CD into the appropriate
drive (in this example we use drive E:).
3. In the Windows Program Manager, select Run from the
File menu. Windows displays the Run dialog box.
4. Type E:\WIN31\PS\SS4650(NX)\SETUP.EXE in the
Command Line field.
5. Click the OK button. This launches the Installer.
6. Respond to the selections displayed in the installation
dialog boxes.
7. When installation is complete the installer will prompt
you to restart Windows. Click the Restart Windows
button.
8. After Windows restarts the Install PostScript Printer
From PPD dialog box will appear.
9. Select NEC SuperScript 4650(NX) PS. Click on Install.
10. When installation is complete click on Close.
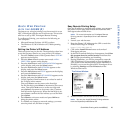
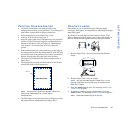
Printing from Your Application
You can do this using the print command of the application
used to create your document.
1. Open a document you wish to print.
2. Select Print from the File menu. The Print dialog box
appears.
3. Select the options you want in the Print dialog box,
including the number of copies and page range.
4. When the options are selected, click OK to print the
document.
Instructions for setup and printing from a Mac OS
computer are on page 59.