NetGear Print Server Manual
60
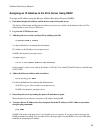
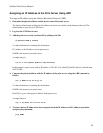
Assigning an IP Address to the Print Server Using RARP
To assign an IP address using the Reverse Address Resolution Protocol (RARP):
1. Determine the physical address and the device name of the print server.
The factory default name and the physical address are shown on a sticker on the bottom of the unit. The
default name on your device is PSxxxxxx.
2. Log in to the UNIX host as root.
3. Add the print server to the /etc/hosts file by adding to the file:
IP_Address NAME # Comment
Use these definitions for entering the information:
IP_Address is the IP address of your print server.
NAME is the name of your print server.
A sample entry is:
192.10.2.54 PS_Rm203 #Default name PS123456
In the example, a print server with an IP address of 192.10.2.54 is called PS_Rm203 and has a default name
of PS123456.
4. Add to the Ethernet Address table /etc/ethers:
00:c0:02:xx:yy:zz NAME
Use these definitions for entering the information:
00:c0:02:xx:yy:zz is the location of your print server.
NAME is the name of your print server.
5. Reset the print server by turning the power off and then on again.
When the print server reboots, it acquires an IP address using RARP.
6. To assure that an IP address has been assigned, check the IP address to MAC address association
using the ping command:
ping NAME
NAME is the name of the print server. You should receive a response. If you get a timeout message, the
RARP procedure has failed. You can either follow the steps again for using RARP or use one of the other
methods for assigning an IP address.


