


320 Chapter 17 Remote management screens
N0115790
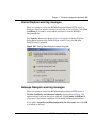
HTTPS example
To change the default HTTPS port on the BCM50a Integrated Router, in your
browser, enter “https://BCM50a Integrated Router IP Address/” as the Web site
address, where “BCM50a Integrated Router IP Address” is the IP address or
domain name of the BCM50a Integrated Router you wish to access.
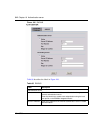
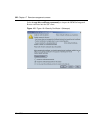
Server Port The HTTPS proxy server listens on port 443 by default. If you change the
HTTPS proxy server port to a different number on the BCM50a
Integrated Router, for example, 8443, you must notify people who need
to access the BCM50a Integrated Router WebGUI to use https://
BCM50a Integrated Router IP Address:8443 as the URL.
Server Access Select a BCM50a Integrated Router interface from Server Access on
which incoming HTTPS access is allowed.
You can allow only secure WebGUI access by setting the HTTP Server
Access field to Disable and setting the HTTPS Server Access field to
an interface.
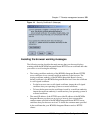
Secure Client
IP Address
A secure client is a trusted computer that is allowed to communicate with
the BCM50a Integrated Router using this service.
Select All to allow any computer to access the BCM50a Integrated
Router using this service.
Choose Selected to just allow the computer with the IP address that you
specify to access the BCM50a Integrated Router using this service.
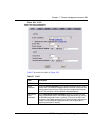
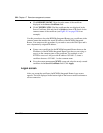
HTTP
Server Port You can change the server port number for a service, if needed,
however, you must use the same port number in order to use that service
for remote management.
Server Access Select the interfaces (If any) through which a computer can access the
BCM50a Integrated Router using this service.
Secure Client
IP Address
A secure client is a trusted computer that is allowed to communicate with
the BCM50a Integrated Router using this service.
Select All to allow any computer to access the BCM50a Integrated
Router using this service.
Choose Selected to just allow the computer with the IP address that you
specify to access the BCM50a Integrated Router using this service.
Apply Click Apply to save your customized settings and exit this screen.
Reset Click Reset to begin configuring this screen afresh.
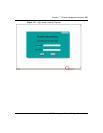
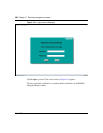
Table 87 WWW
Label Description