


102 Océ TDS600 Multifunctional Digital System User Manual
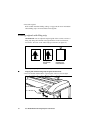
[63] Automatic shift with the
‘Align’
function
2
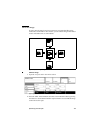
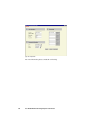
Press the ‘Align’ function button and select a horizontal alignment value (Left,
Middle or Right) with the arrow buttons.
3
Press the ‘Align’ function button again and select a vertical alignment value
(Top, Middle, or Bottom) with the arrow buttons.
Note:
If you select ‘Center’, make sure the original width is specified as
follows (see ‘The scan width’ on page 92):
■
‘Standard’ if a standard sized original is used
■
The exact original width (numeric) if a non standard sized original is used.
4
Feed your original.
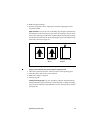
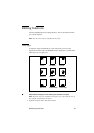
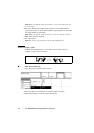
Note:
You must switch on standard cut length to get copies like the one in the
example of illustration 62 above. If synchro cut length has been switched on,
the result will be as follows:
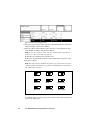
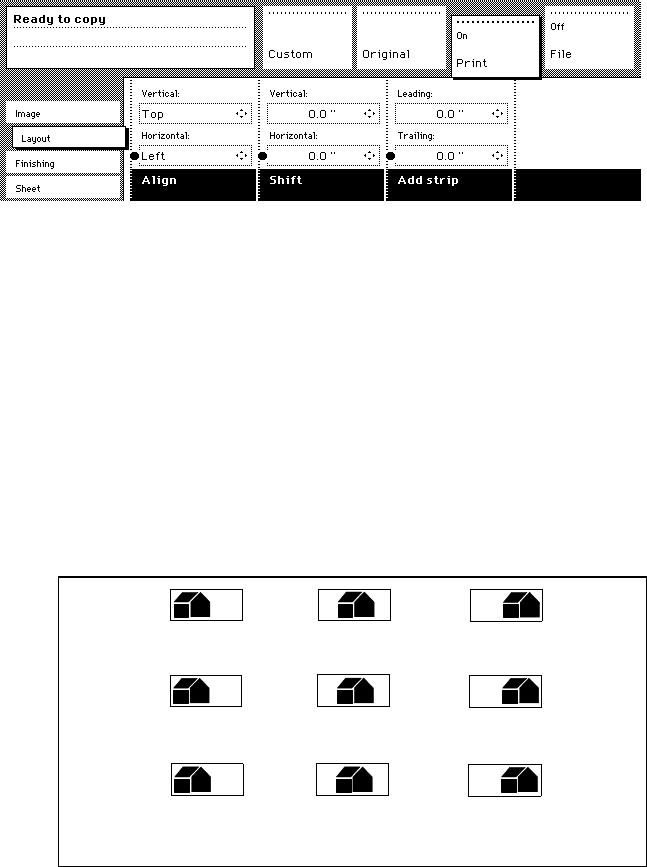
[64] Auto shift options with synchro cut option active
In ‘Shift the image’ on page 103 you can read how to define the exact place of
your image on the page.
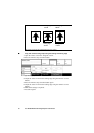
Top Left Top Middle Top Right
Middle Left Middle Middle Right
Bottom Left Bottom Middle Bottom Right