Technical information
116 - ENGLISH
Appendix
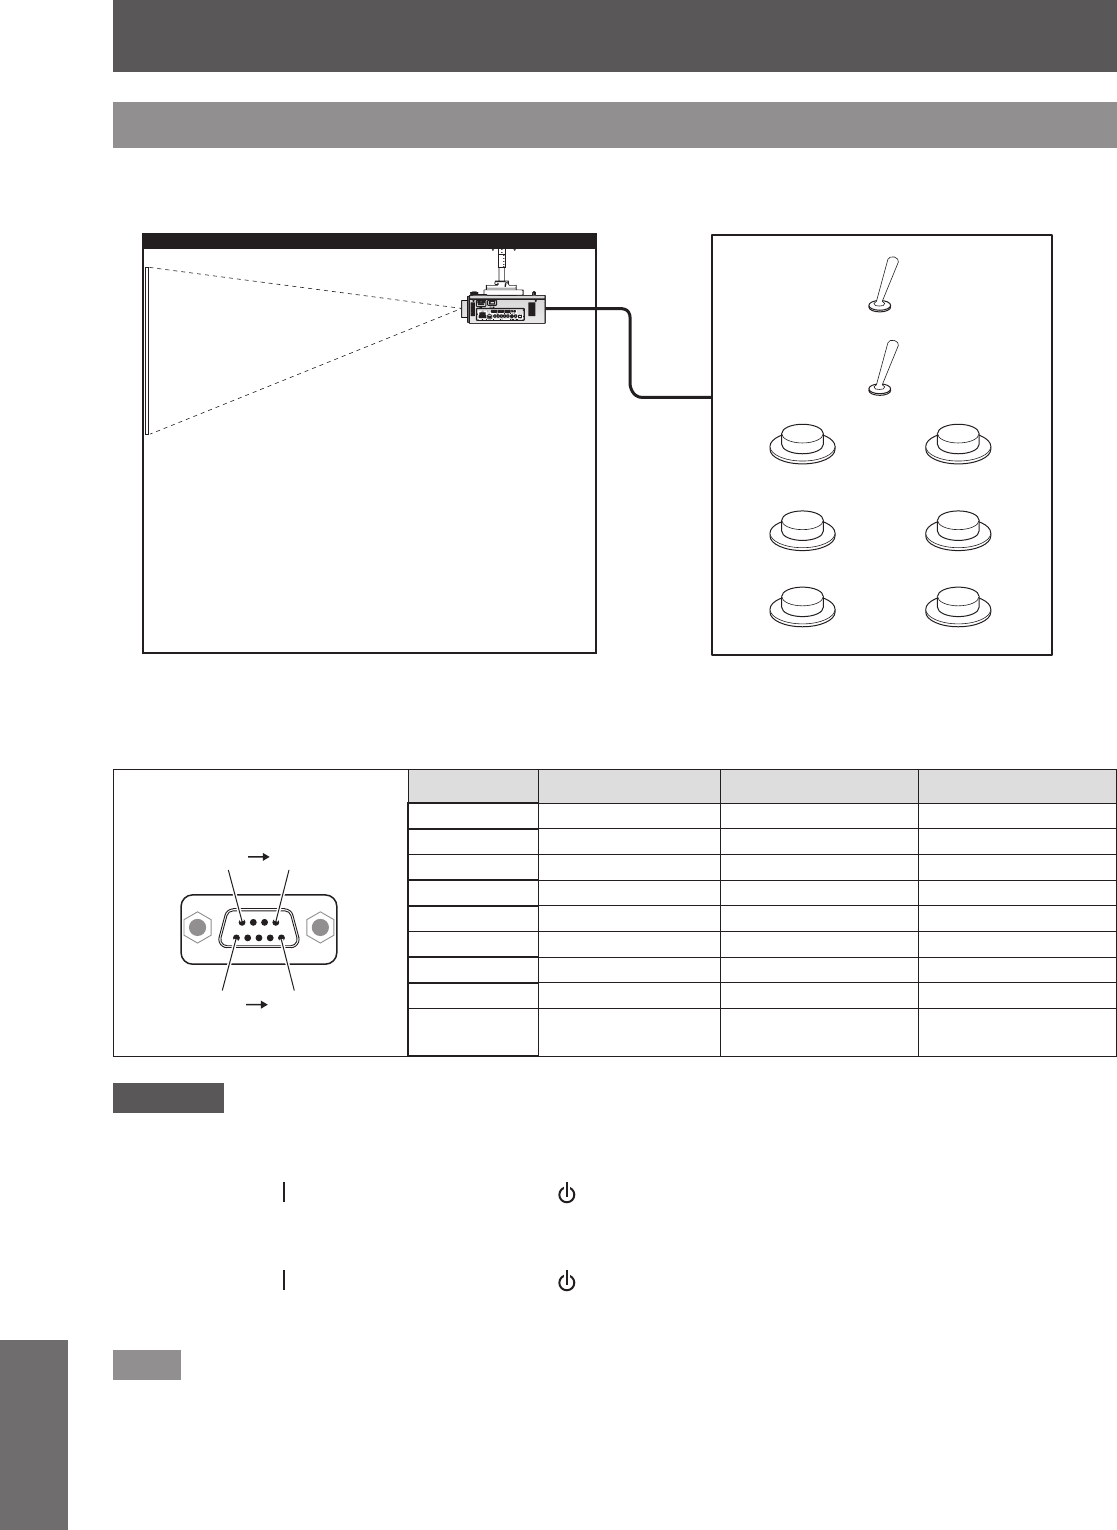
<REMOTE 2 IN> terminal
It is possible to control the projector remotely (by external contact) from a control panel located away from the
projector where remote control signals cannot reach. Use the <REMOTE 2 IN> terminal on the connecting
terminals of the projector to connect to the control panel.
RGB1 VIDEO
RGB2 S-VIDEO
DVI-D HDMI
Remote control Contact control
Remote control/Contact control
Standby Lit
Lamp
Meeting room or other installation location
Remote control panel in another location
■
Pin assignments and signal names
D-Sub 9-pin (Outside view)
Pin No. Signal name Open (H) Short (L)
(1) (5)
(6) (9)
(1) GND ― GND
(2) POWER OFF ON
(3) RGB1 Other RGB1
(4) RGB2 Other RGB2
(5) VIDEO Other VIDEO
(6) S-VIDEO Other S-VIDEO
(7) DVI-D Other DVI-D
(8) SHUTTER OFF ON
(9) RST/SET
Controlled by remote
control
Controlled by
external contact
Attention
z
When controlling, make sure to short-circuit pins (1) and (9).
z
When pins (1) and (9) are short-circuited, the following buttons on the control panel and the remote control
cannot be used.
The power on <
> button, the power standby < > button, the <SHUTTER> button, and the RS-232C
commands and network functions corresponding to these functions cannot be used either.
z
When pins (1) and (9) are short-circuited, do not short-circuit any pins from (3) to (7) with pin (1). The following
buttons on the control panel and the remote control cannot be used.
The power on < > button, the power standby < > button, <RGB1> button, <RGB2> button, <DVI-D> button,
<VIDEO> button, <S-VIDEO> button, <HDMI> button, <SHUTTER> button, and the RS-232C commands and
network functions corresponding to these functions cannot be used either.
Note
z
For pin (2) to pin (8) settings, you can make changes if you set [REMOTE2 MODE] to [USER] (
page 71).


