47
*1 •TheVMDinformationcanbesearchedbyPanasonicnetworkdiskrecorders(WJ-ND400series).Referto
the operating instructions of the connected devices for further information about the functions and set-
tings.
*2 •Whileacameraisduringoperationsuchaspanning,tilting,zooming,focusadjustment,brightnessadjust-
ment or auto mode, the VMD information will be added.
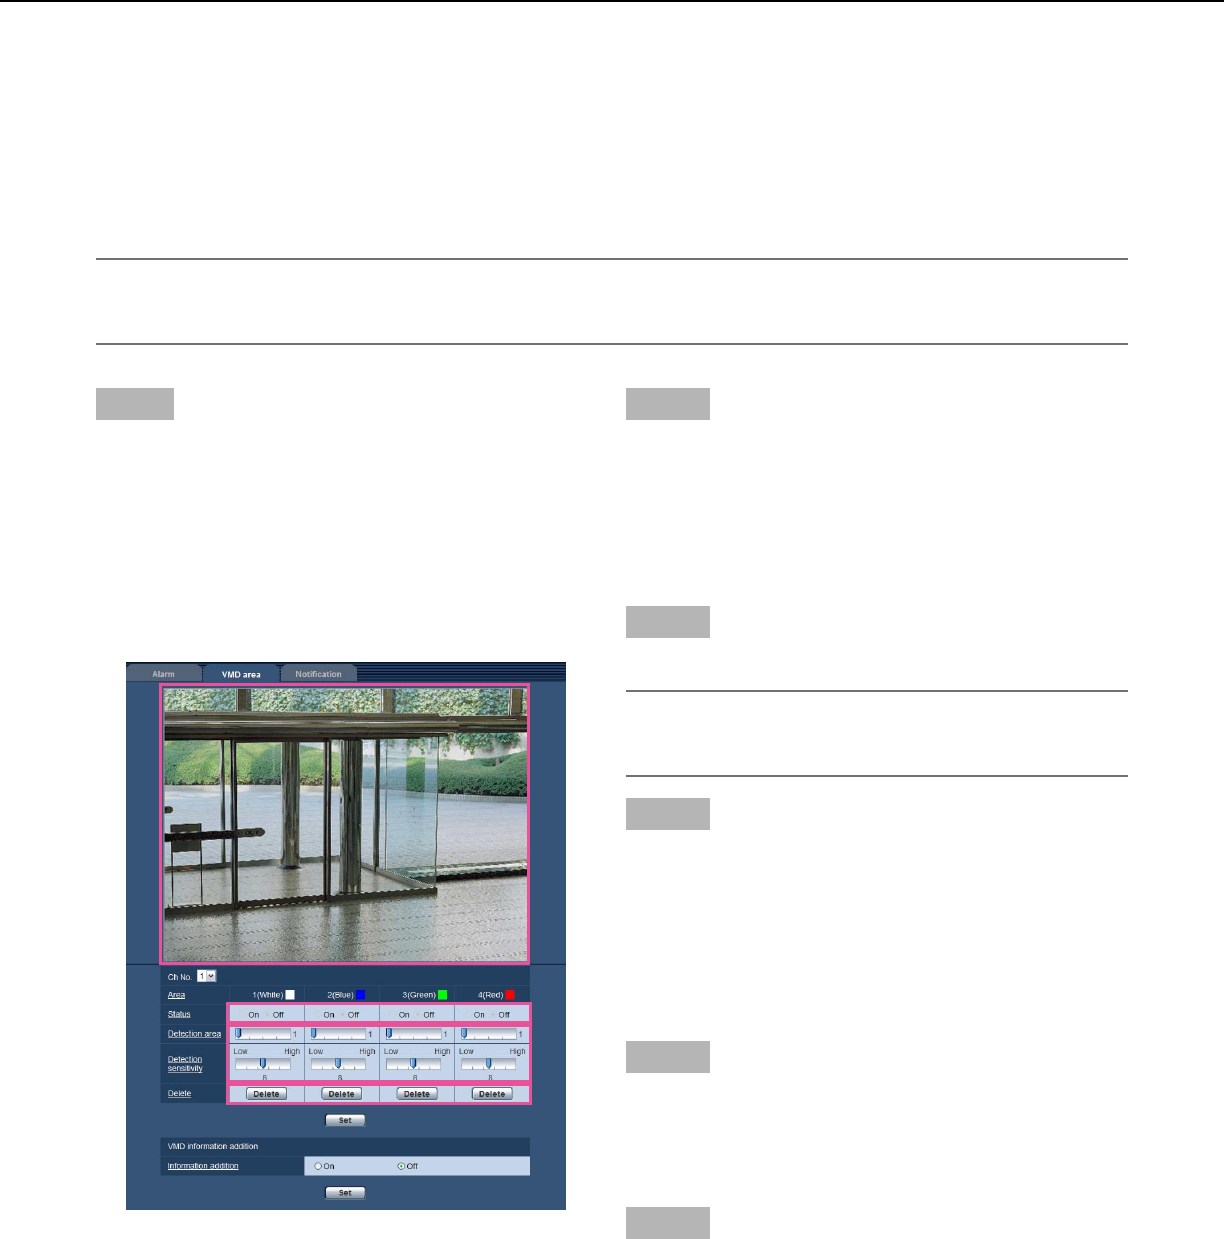
The following is the procedure to set VMD areas
Important:
•Whenthesettingsarebeingconfiguredonthesetupmenu,sometimestheVMDfunctionmaynotworkcorrect-
ly.
Step1
Set the video motion detection area by dragging the
mouse on the screen.
→ The designated area will become the VMD area and
the outline will be displayed. When 2 - 4 VMD areas
are set, each area will be numbered in order. The
areas will be identified by the respective outline col-
ors. The "Status" of the outline to be set for the area
will become "Valid".
Step 2
Adjust "Detection area" and "Detection sensitivity"
using the slide bar. The currently displayed area and its
detection sensitivity will be displayed in the "Detection
area" section. Change areas and the settings of
"Detection area" and "Detection sensitivity" as neces-
sary.
Step 3
Click the [Set] button after completing the settings.
Important:
•Thesettingwillnotbeappliedunlessthe[Set]but-
ton is clicked.
Step 4
To invalidate the VMD area, click the [Set] button after
selecting "Off" for "Status" of the VMD area to be invali-
dated.
→ The outline of the invalidated VMD area will turn to a
dotted line. When the VMD area is invalidated, no
alarm will occur even when a motion can be recog-
nizedinthearea.
Step 5
To delete the VMD area, click the [Delete] button corre-
sponding to the area to be deleted.
→ The outline of the respective VMD area will disap-
pear.
Step 6
Click the [Set] button.
→ The edited settings will be applied.


