


9
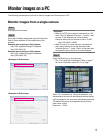
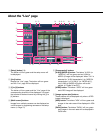
!4 [Brightness] buttons (*2)
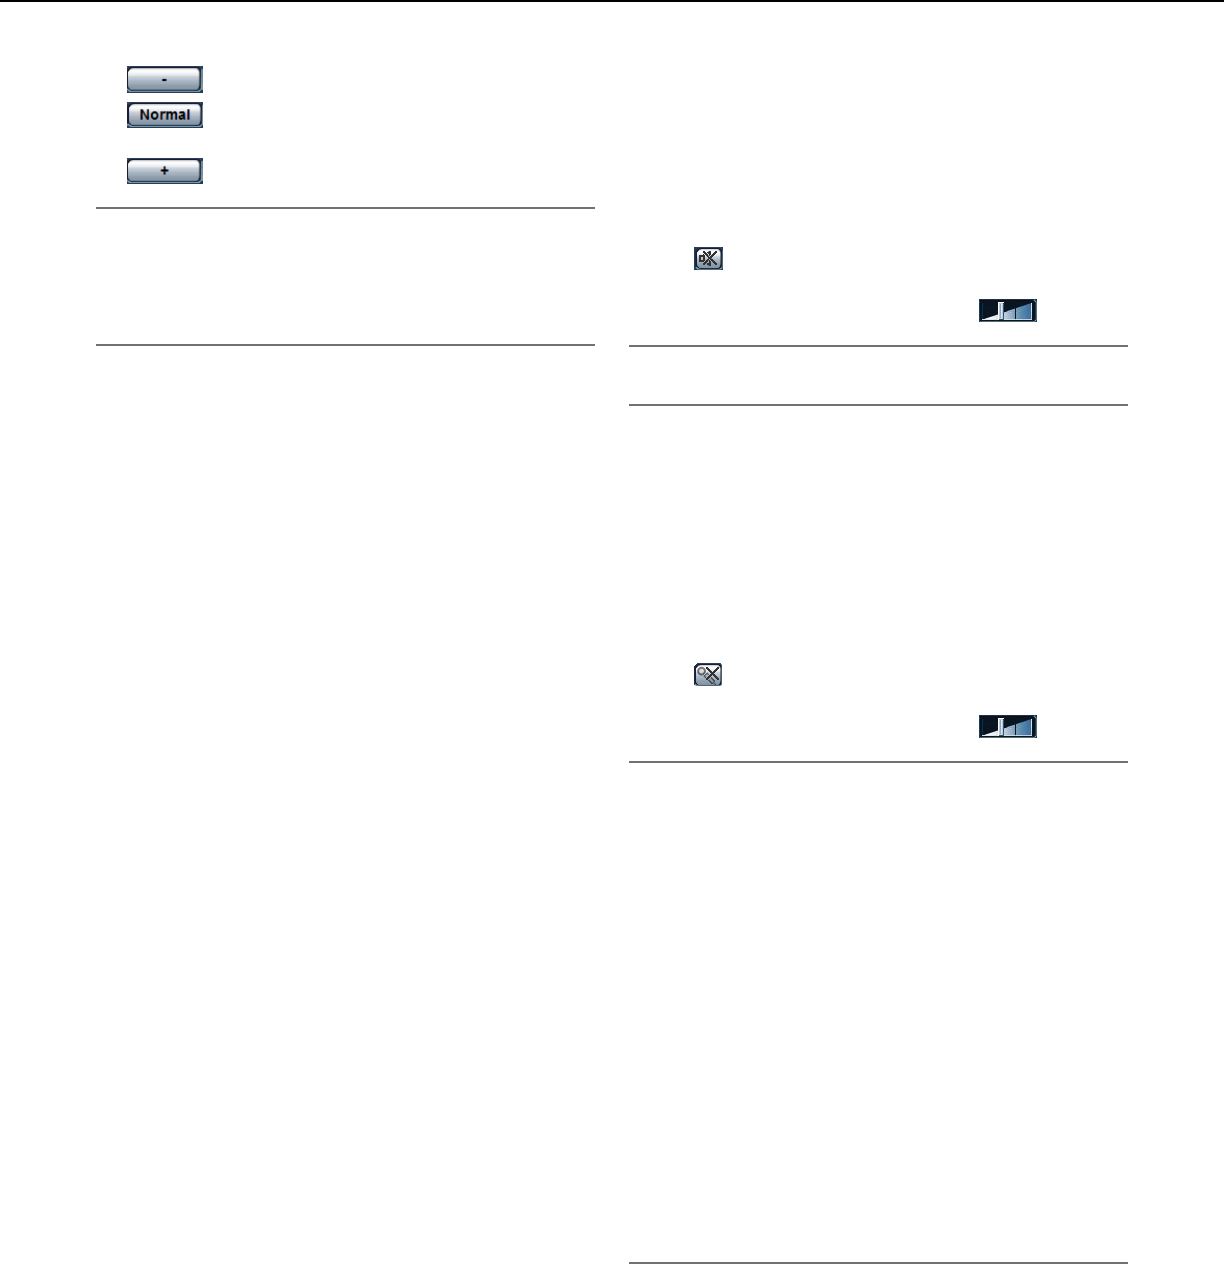
:Thedisplayedimagewillbedarker.
:Theadjustedbrightnesswillreturntothe
default brightness.
:Imagewillbebrighter.
Note:
•Whenthe[Brightness]buttonsareclickedwhilethe
camera is at the preset position, the adjusted bright-
ness will automatically be registered for the current
preset position.
!5 Preset (*2)
Select a preset position from the pull-down menu
and click the [Go] button. The camera will move to
the selected preset position. When "Home" is
selected, the camera will move to the home posi-
tion. To activate preset positions and home position,
it is required to configure the settings on the SETUP
MENU of camera in advance. (☞ Page 41)
!6 Unit title
The unit title entered for "Unit title" on the [Basic]
tab will be displayed. (☞ Page 30)
!7 Camera title
The camera title entered for "Camera title" on the
[Basic] tab will be displayed. (☞ Page 30)
!8 [Alarm occurrence indication] button (*2)
This button will be displayed at an alarm occur-
rence, and the channel of alarm occurrence (one of
q to r buttons) will light. When the button is
clicked, the button will disappear and the alarm out-
put connector will be reset. (☞ Page 13)
!9 [Full screen] button
Images will be displayed on a full screen. To return
to the "Live" page, press the [Esc] key.
@0 [One shot] button
Click this button to take a picture (a still picture).
The picture will be displayed on a newly opened
window. When right-clicking on the displayed
image, the pop-up menu will be displayed. It is pos-
sible to save the image on the PC by selecting
"Save" from the displayed pop-up menu.
When "Print" is selected, printer output is enabled.
@1 [Mic input] button (*3)
Turns on/off the audio reception (hear audio from
the unit on a PC).
This button will be displayed only when "Mic input",
"Interactive(Half-duplex)" or "Interactive(Full-
duplex)" is selected for "Audio transmission/recep-
tion" on the setup menu. (☞ Page 41)
When this button is clicked, the button will turn into
the button and audio from the unit will not be
heard. Audio volume can be adjusted (Low/Middle/
High) by moving the volume cursor .
Note:
•MicinputisavailableonCh1only.
@2 [Audio output] button (*3)
Turns on/off the audio transmission (play audio from
the PC on the unit speaker).
This button will be displayed only when "Audio out-
put", "Interactive(Half-duplex)" or "Interactive(Full-
duplex)" is selected for "Audio transmission/recep-
tion" on the setup menu. (☞ Page 41)
The button will blink during the audio transmission.
When this button is clicked, the button will turn into
the button and audio from the unit will not be
heard. Audio volume can be adjusted (Low/Middle/
High) by moving the volume cursor .
Note:
•AudiooutputisavailableonCh1only.
•Whenauserisusingtheaudiotransmissionfunc-
tion with "Interactive(Half-duplex)" selected, the
[Mic input] button and the [Audio output] button will
be inoperable for the other users. When
"Interactive(Full-duplex)" is selected, the transmis-
sion button is inoperable for other users.
•Possibledurationofaudiotransmissionisupto5
minutes per transmission. When 5 minutes have
passed, audio transmission will automatically stop.
To turn the audio transmission function on, click the
[Audio output] button again.
•Whentheunitisrestarted,theadjustedvolumelevel
(for both the audio transmission and reception) will
return to the level that had been set on the [Audio]
tab on the setup menu. (☞ Page 41)
•Actualvolumelevelwillchangeinthreestepseven
though the volume cursor can be adjusted minutely.