


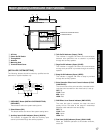
21
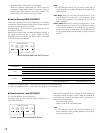
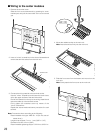
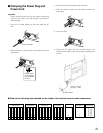
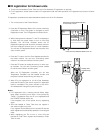
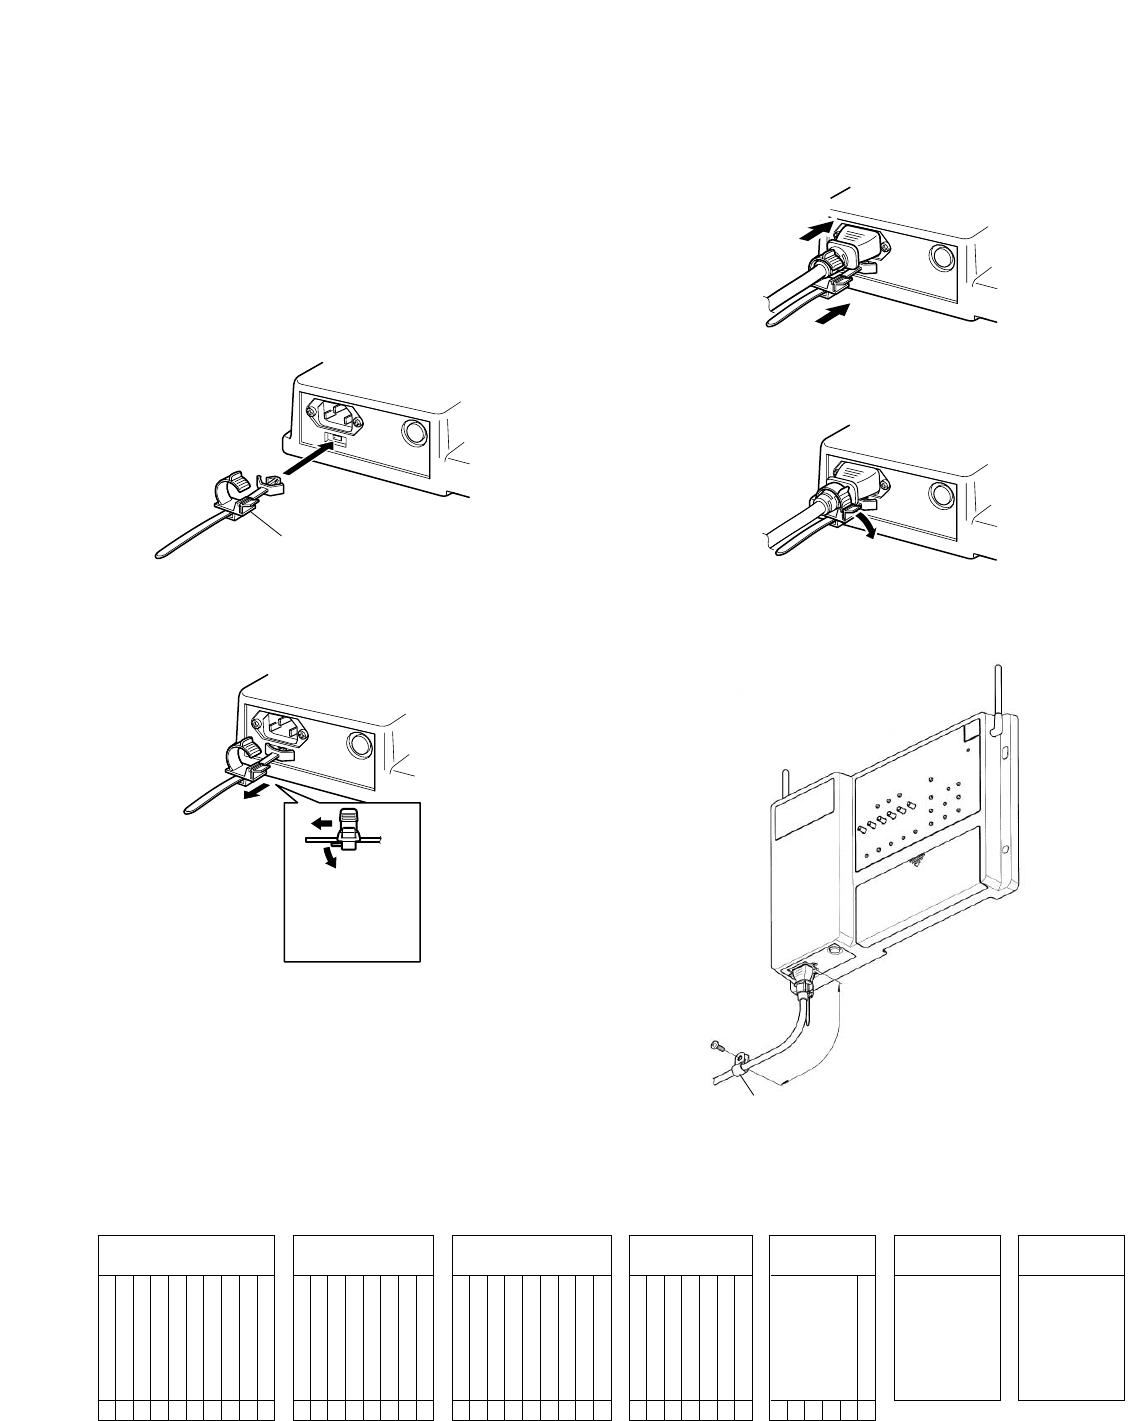
3. Insert the power plug into the power cord inlet.
4. Push the holder forward until the holder touches the
power plug.
5. Lock the holder.
6. Clamp the AC cable with the provided clamp, and
secure the AC cable clamper to the wall by fastening the
screws.
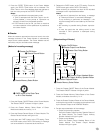
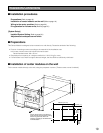
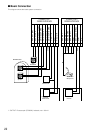
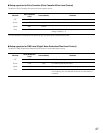
AUX SP + (8Ω)
CONNECTOR 1
ORDER INTERFACE
1
AUX SP GND2
OUTSIDE SP + (8Ω)3
OUTSIDE SP GND4
OUTSIDE MIC +5
OUTSIDE MIC –6
OUTSIDE MIC GND7
V/DET 1 IN8
COM9
V/DET 2 IN10
SPEED TEAM
CONNECTOR 3
POS INTERFACE
1
TALK LOCK RELEASE2
MANAGER SELECT3
PAGE SELECT4
IN COM5
POS AUDIO IN6
POS AUDIO GND7
POS AUDIO OUT8
POS AUDIO GND9
V/DET 1
CONNECTOR 4
POS INTERFACE
1
V/DET 22
TALK3
PAGE4
OUT COM5
NIGHT MODE6
OUTSIDE SP LEVEL7
CONNECTOR 5
1
2
N.C
N.C
3
4
5
COM6
CONNECTOR 6
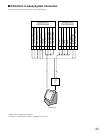
MAINTENANCE
DOUBLE-DRIVE-THRU
Use a LAN cable
with the shield type
CONNECTOR 7
DDT INTERFACE
AUX MIC +
CONNECTOR 2
ORDER INTERFACE
1
AUX MIC –2
AUX MIC GND3
AUX MIC PTT4
COM5
DEVICE CONTROL6
COM7
N.C8
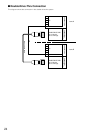
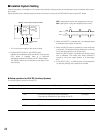
● Refer to the following lists attached on the inside of the terminal cover to make connections.
■ Clamping the Power Plug and
Power Cord
Important:
Surely clamp the power plug to this center module and
screw the AC cable to the wall using the provided AC
cable clamper.
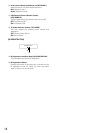
1. Insert an AC cable holder into the hole under the AC
inlet.
2. Slide the holder to the backward by pushing down the
clamp lever.
Slide the holder
to the backward
by pushing down
the lever.
3
2
150 mm - 200 mm
{5-15/16" - 7-7/8"}
AC cable holder
AC cable clamper