


Installing the IpChannel Bank 27
SmartNode 4400 Series Getting Started Guide 3 • Hardware installation
Location and mounting requirements
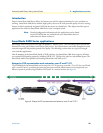
The SmartNode 4400 is intended to be placed on a desktop or similar sturdy, flat surface that offers easy access
to the cables or be installed in a standard 19-inch rack chassis. Allow sufficient space at the rear of the chassis
for cable connections. Additionally, you should consider the need to access the unit for future upgrades
and maintenance.
This completes the planning phase for installation. The next section begins the installation procedures.
Installing the IpChannel Bank
Unpacking the Model SN4400 series IpChannel Bank
Inspect the shipping carton for external damage. Note any damage before removing the container contents.
Report any equipment damage to the shipping carrier immediately for claim purposes. Save all packing mate-
rial in case you need to return an item to the factory for servicing.
The IpChannel Bank comes with the following items:
• Model SN4400 Series IpChannel Bank Quick Start Guide
• Model SN4400 Series IpChannel Bank
• An RJ-45-to-RJ-45 cable for use with the console and Ethernet ports
• A DB-9-to-RJ-45 (EIA-561) adapter for connecting a PC’s serial port to the IpChannel Bank console port
• Rack mounting kit with rack ears and mounting hardware
• CD-ROM containing product literature, the Model SN4400 IpChannel Bank Getting Started Guide and the
Smartware Software Configuration Guide
Note Power cables are shipped separately from the Model SN4400 Series
IpChannel Bank
Note Contact Patton Electronics for the proper RJ-21X cable for the
FSX ports
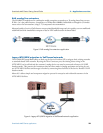
IpChannel Bank chassis installation
Do the following:
1. If you have not done so already, remove the IpChannel Bank from its shipping container.
2. If you are installing the IpChannel Bank in a 19-inch rack, go to step 4. Otherwise, place the IpChannel
Bank at the desired location.
3. Go to section “Connecting cables” on page 28
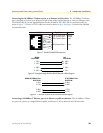
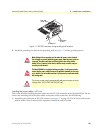
4. Install the rack mounting ears onto the IpChannel Bank using the mounting hardware provided.
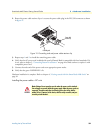
5. Place the IpChannel Bank at the desired position in the rack.
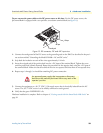
6. Secure the IpChannel Bank in position with the mounting screws.
7. Go to section “Connecting cables” on page 28