


7-5
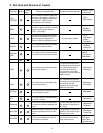
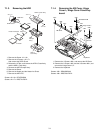
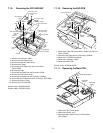
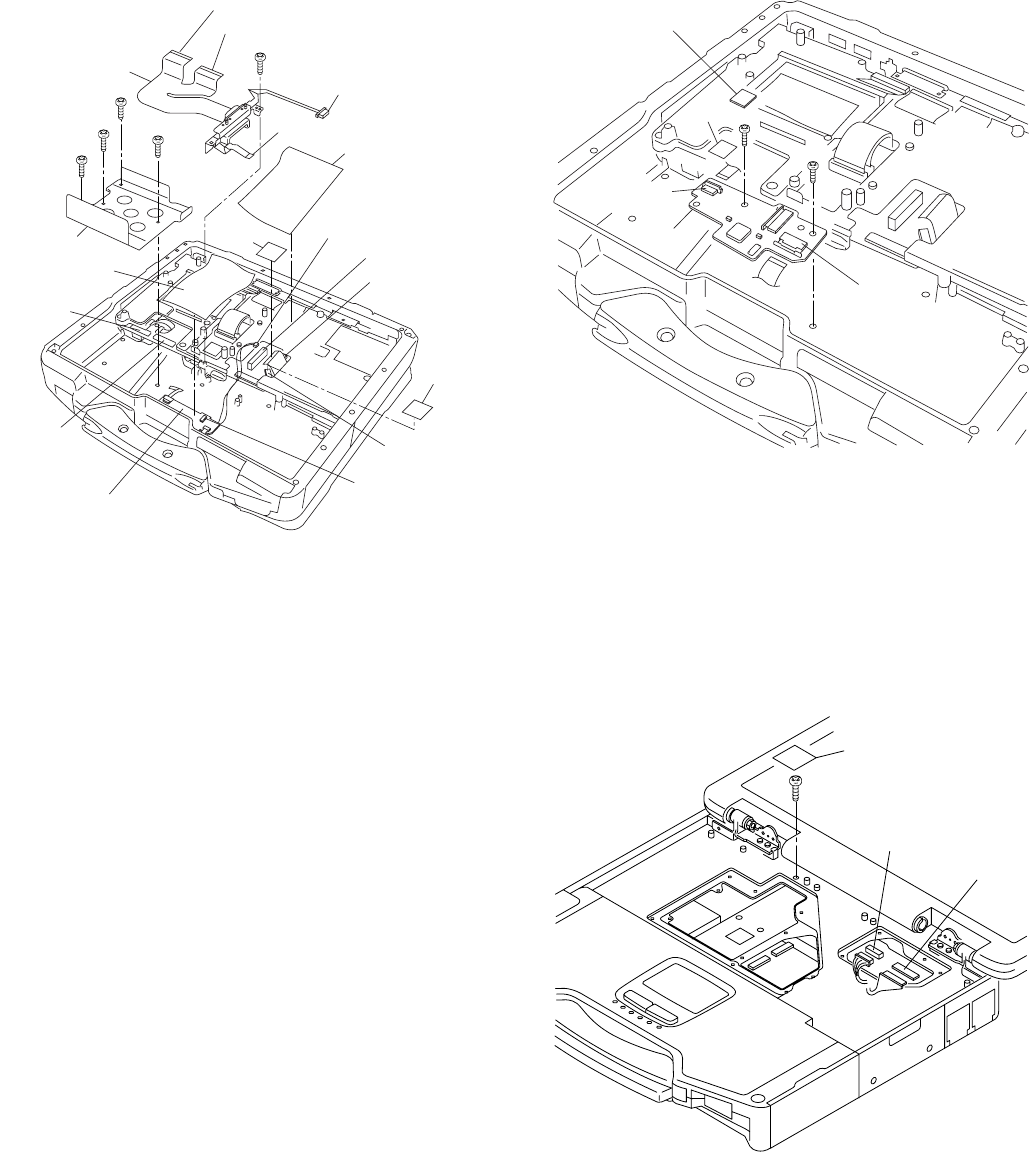
7.1.9. Removing the FPC HDD BAT
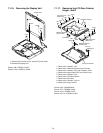
1. Remove the 4 Screws. <N29>
2. Remove the HDD Cable Cover.
3. Remove the Antenna Cable Sheet.
4. Remove the 2 Tapes.
5. Disconnect the 2 Cables from the 2 Connectors.
(CN10,CN26)
6. Remove the Tape.
7. Disconnect the Cable from the Connector. (CN9)
8. Remove the Pad Protect Sheet.
9. Disconnect the Cable from the Connector. (CN800)
10. Disconnect the 2 Cables from the 2 Connectors. (CN7,CN8)
11. Remove the Screw. <N16>
12. Remove the FPC HDD BATT.
Screws <N16>: DRQT26+E5FKL
Screws <N29>: DRQT26+E3FNL
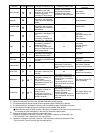
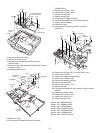
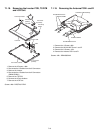
7.1.10. Removing the PAD PCB
1. Remove the Tape and disconnect the Cable from the Con-
nector. (CN801)
2. Disconnect the Cable from the Connector. (CN802)
3. Remove the TP PCB Screw Sheet.
4. Remove the 2 Screws. <N29>
5. Remove the PAD PCB.
Screws <N29>: DRQT26+E3FNL
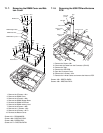
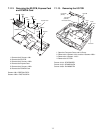
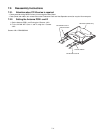
7.1.11. Removing the Main PCB
1. Remove the TOP Screw Sheet.
2. Remove the Screw. <N7>
3. Disconnect the 2 Cables from the 2 Connectors.
(CN17,CN27)
<N29>
<N16>
<N29>
<N29>
<N29>
Connector(CN10)
Connector(CN26)
HDDCableCover
FPCHDDBAT
AntennaCableSheet
toConnector(CN800)
Connector(CN800)
toConnector(CN26)
Tape
Connector(CN9)
PadPCB
Tape
toConnector(CN8)
toConnector(CN7)
Connector
(CN8)
PadProtect
Sheet
Connector
(CN7)
toConnector(CN9)
<N29>
<N29>
PadPCB
Connector
(CN802)
Connector
(CN801)
Tape
TPPCBScrewSheet
<N7>
TOPScrewSheet
Connector
(CN17)
Connector
(CN27)