


37
GENERAL INFORMATION
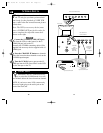
Antenna Connections . . . . . . . . . . . . . . . . . . . .10-11
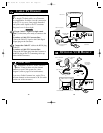
Assembly of Net1Card . . . . . . . . . . . . . . . . . . . . .6-9
Audio Connections . . . . . . . . . . . . . . . . . . . . . .14-15
Cable TV Connections . . . . . . . . . . . . . . . . . . .12-13
Closed Captioning . . . . . . . . . . . . . . . . . . . . . . . . .36
Controls/TV . . . . . . . . . . . . . . . . . . . . . . . . . . . . .33
Features . . . . . . . . . . . . . . . . . . . . . . . . . . . . . . . . . .4
Glossary . . . . . . . . . . . . . . . . . . . . . . . . . . . . . . . .38
Hookups . . . . . . . . . . . . . . . . . . . . . . . . . . . . . .10-17
Index . . . . . . . . . . . . . . . . . . . . . . . . . . . . . . . . . . .37
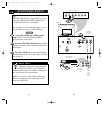
Input Jacks . . . . . . . . . . . . . . . . . . . . . . . . . . . . . . .9
Installation of Net1Card . . . . . . . . . . . . . . . . . . . .8-9
Introduction . . . . . . . . . . . . . . . . . . . . . . . . . . . . . . .4
On-Screen Menu Displays
Commercial Settings . . . . . . . . . . . . . . . . . . . . .18
Receiver Control . . . . . . . . . . . . . . . . . . . . . . . .21
Transmitter Control . . . . . . . . . . . . . . . . . . . . . .23
Factory Test Menu . . . . . . . . . . . . . . . . . . . . . . .30
TV Features . . . . . . . . . . . . . . . . . . . . . . . . . . . .33
Precautions . . . . . . . . . . . . . . . . . . . . . . . . . . . . . . .2
Remote Operation . . . . . . . . . . . . . . . . . . . . . . . . . .5
Safety Warnings . . . . . . . . . . . . . . . . . . . . . . . . . . .2
S-Video Inputs . . . . . . . . . . . . . . . . . . . . . . . . .16-17
Table of Contents . . . . . . . . . . . . . . . . . . . . . . . . . .3
Troubleshooting . . . . . . . . . . . . . . . . . . . . . . . . . .39
TV Control Panel . . . . . . . . . . . . . . . . . . . . . . . . .31
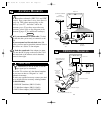
Unpacking Net1Card I . . . . . . . . . . . . . . . . . . . . .6-7
VCR Connections . . . . . . . . . . . . . . . . . . . . . . .13-17
Video Connections . . . . . . . . . . . . . . . . . . . . . .14-15
Warranty Information . . . . . . . . . . . . . . . . . . . . . .40
INDEX
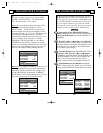
Remember, if the menus do not come up when you
press the A or D button, press the TV/GUEST button
and try again.
36
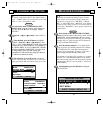
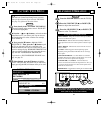
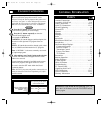
Press CC/STATUS to select
Closed Captioning mode
CAPTION 1
CAPTION 2, CAPTION 3, CAPTION 4
or
TEXT 1, TEXT 2, TEXT 3, TEXT 4
or
OFF
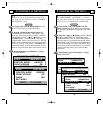
CLOSED CAPTIONING
Closed Captioning modes
when pressing the CC button
on the remote control.
C
losed Captioning allows you to read the voice con-
tent of television programs on the TV screen.
Designed to help the hearing impaired this feature uses
on-screen “text boxes” to show dialogue and conversa-
tions while the TV program is in progress. This feature
will work even when the Receiver TV is “LOCKED.”
Press the CC button on the remote control to bring
up the Closed Captioning on-screen display.
Press the CC button repeatedly to select the
desired Closed Caption mode.
For example: CAPTION 1.
CAPTION 1, 2, 3, or 4: dialogue (and descriptions) for
the action on the captioned TV program shows on-
screen.
TEXT 1, 2, 3, or 4: often used for channel guide, sched-
ules, or bulletin board information for CC programs.
Note: “CAPTION 1” is the most commonly used mode
by captioned programs.
After making your Closed Caption mode selection
the menu will time out and disappear from the screen
within a few seconds.
Closed Captioning material (if available on the current
selected TV program) will appear on the TV screen.
To cancel, select the OFF mode within the Closed
Captioning feature.
Note: Not all TV programs and product commercials are
made for broadcast with Closed Captioning (CC) infor-
mation included.
BEGIN
Net 1Card IB 2/15/00 12:18 PM Page 36