Procedure for Using the LiveGateway Audio Clip Recorder
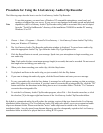
The following steps describe how to use the LiveGateway Audio Clip Recorder:
Note
To use this program, you must have a Windows NT-compatible microphone, sound card, and
speakers configured on your server. If your server is not equipped with audio record and playback
capabilities, the LiveGateway Audio Clip Recorder utility (and its associated files) can be copied
from the "Tools\GwSndRecorder" directory of the installation CD-ROM to another PC running
Windows 95 or NT.
1. Choose -> Start -> Programs -> PictureTel LiveGateway -> LiveGateway Custom Audio Clip Utility
from your Windows NT desktop.
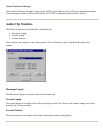
2. The LiveGateway Audio Clip Recorder application window is displayed. To record a new audio clip,
select the appropriate Audio Clip Type from the Audio Clip Type dropdown list.
3. Click the Record button to record your message. Speak into your microphone to begin recording your
new audio clip.
Note: Each audio clip has a maximum message length (in seconds) that can be recorded. Do not exceed
this length when recording your audio clip.
4. When you're done recording your audio clip, click the Stop button.
5. To playback and listen to the audio clip you just recorded, click the Play button.
6. If you want to change the audio clip again, click the Record button and enter your new message.
7. To save your audio clip, click the Save button. A message box will appear warning you that an existing
audio file is about to be overwritten. If you don't want to overwrite the existing audio file, click the "No"
button and follow the directions in the dialog box to save it to another folder. Click the "Yes" button to
overwrite the existing audio file.
8. To exit the LiveGateway Audio Clip Recorder program, select File -> Exit from the menu bar, or click
the closebox [X] in the upper right hand corner of the LiveGateway Audio Clip Recorder titlebar.
By default, a customized audio clip will replace the existing version of that type located in the LiveGateway
installation folder (directory). The LiveGateway Audio Clip utility also allows you to save customized audio
clips to an alternate folder. Please note that the "active" audio clips must be stored in the LiveGateway
installation folder. Any clip stored in an alternate directory must be subsequently copied to the LiveGateway
installation folder in order to be played back to a calling H.320 system.


