


Pitney Bowes DA300 Operator Guide 2-11
Setting Up the DA300 Printer • 2
Connecting
the DA300
to Your
Computer
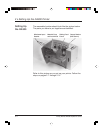
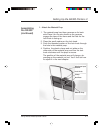
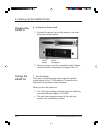
5. Connect the Printer Cable
Use either the a parallel cable supplied or a serial cable of
your own to connect the DA300 to your computer.
1. Parallel Cable - Align the end of the cable connector
labelled “Printer” with the parallel port on the
printer's interface panel and push the cable connec-
tor into the port.
Serial Cable - Align one end of the cable connector
to the serial port on the printer's interface panel and
push the cable connector into the port.
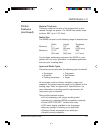
Parallel PortSerial Port
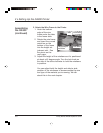
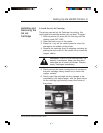
2. Parallel Cable - Secure the connector by snapping
the two wire clips over the corresponding tabs on
the connector.
Serial Cable - Secure the connector by screwing in
the small nuts on either side of the connector.
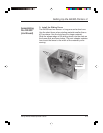
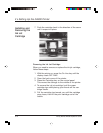
3. Parallel Cable - Align the other end of the cable
connector labelled “Computer” with the printer port
on your computer and push the cable connector
into the port.
Serial Cable - Align the other end of the cable to the
serial connector on your computer and secure it by
screwing in the small nuts on either side of the
connector.