E – 24
Selecting the
projection type
This reorients your image for your type of projection.
1 Press MENU to display the main menu.
2 Press the cursor / key to select “SETTING MENU.”
3 Press L-CLICK to display the SETTING MENU.
4 Press the cursor / key to select “PROJECTION.”
5 Press the cursor + / – key to select the projection type
which suits the Data Projector setup conditions.
The following four projection types can be selected:
• FRONT FLOOR (Normal),
• REAR CEILING (Upside down and horizontally re-
versed),
• REAR FLOOR (Horizontally reversed), or
• FRONT CEILING (Upside down).
6 Press L-CLICK.
When you have connected the component video (YCbCr) signal
output jacks of the video component to the RGB IN connector on
the unit (see page 11), set “IMAGE MODE” to “YCbCr” to obtain
better picture quality.
1 Select the input source RGB (see page 16 or 21).
2 Press MENU to display the main menu.
3 Press the cursor / key to select “IMAGE ADJ MENU.”
4 Press L-CLICK to display the IMAGE ADJ MENU.
5 Press the cursor / key to select “IMAGE MODE.”
6 Press L-CLICK to display the IMAGE MODE menu.
7 Press the cursor / key to select “INPUT MODE.”
8 Press the cursor + / – key to select “YCbCr.”
Each press changes the setting to “RGB” or “YCbCr.”
9 Press L-CLICK.
The change of settings will be confirmed.
When you display the IMAGE MODE menu next, the
following IMAGE MODE menu for YCbCr will be dis-
played.
When you have disconnected the present video
component from the RGB IN connector and
reconnected a computer
Set “INPUT MODE” to “RGB” in step 8 above.
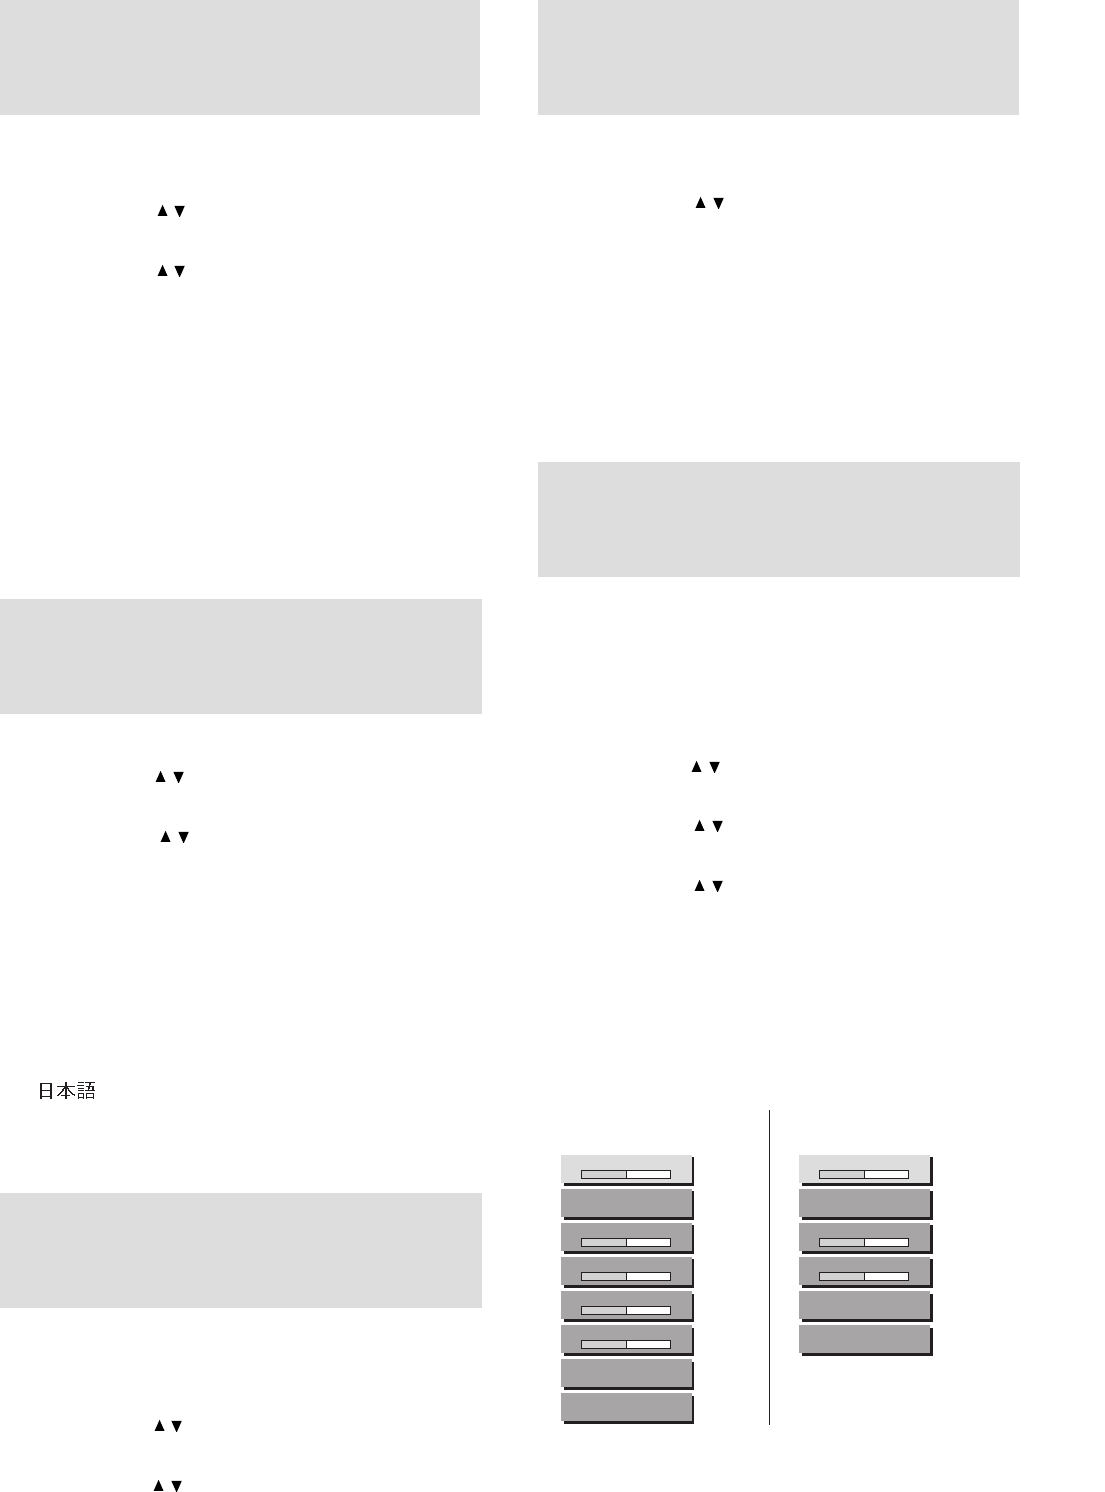
IMAGE ADJ MENU for
YCbCr (video component)
IMAGE ADJ MENU for RGB
(computer)
Setting “INPUT
MODE” to “YCbCr”
Adjusting the
volume
The volume can also be adjusted with VOLUME +/– on the remote
control (see page 19).
1 Press MENU to display the main menu.
2 Press the cursor / key to select “IMAGE ADJ MENU.”
3 Press L-CLICK to display the IMAGE ADJ MENU.
4 Press the cursor / key to select “VOLUME,” then press
the cursor + / – key to adjust the volume.
1 Press MENU to display the main menu.
2 Press the cursor / key to select “SETTING MENU.”
3 Press L-CLICK to display the SETTING MENU.
4 Press the cursor / key to select “LANGUAGE,” then
press the cursor + / – to select one of the following
languages:
• ENGLISH (English),
• DEUTSCH (German),
• FRANÇAIS (French),
• ITALIANO (Italiano),
• ESPAÑOL (Spanish),
• SVENSKA (Swedish), or
• (Japanese).
5 Press L-CLICK.
Selecting a
display language
VOLUME
–+
IMAGE MODE
BRIGHTNESS
–+
CONTRAST
–+
COLOR
–+
TINT
–+
WHITE BALANCE
ALIGNMENT
VOLUME
–+
IMAGE MODE
BRIGHTNESS
–+
CONTRAST
–+
WHITE BALANCE
ALIGNMENT
Selecting the
background
1 Carry out steps 1 to 3 in “Selecting the projection type”
on the left column.
2 Press the cursor / key to select “BACKGROUND.”
3 Press the cursor + / – key to select one of the following
background types:
• BLUEBACK,
• BLACKBACK, or
• FOCUS PATTERN.
4 Press L-CLICK.


