E – 27
Selecting the starting mode for the next
use of the unit
Set “STARTING RGB” to “LATEST” to use the most recent
settings (RGB STANDARD or CUSTOM 1 to 5) when you turn on
the unit next. If you set “STARTING RGB” to “STANDARD,” the
unit will select the most suitable resolution every time you turn on
the unit.
1 Carry out steps 1 to 4 in “Storing the most recent settings”
on the previous page.
2 Press the cursor / key to select “STARTING RGB.”
3 Press the cursor +/– key to select either “LATEST” or
“STANDARD.”
4 Press L-CLICK.
The change of settings will be confirmed.
Resetting the present settings to factory
settings
To reset the changed “PICTURE ADJ,” “FINE PICTURE,” “H
POSITION,” and “V POSITION” to the factory settings, carry out
the following steps.
1 Carry out steps 1 to 4 in “Storing the most recent settings”
on the previous page.
2 Press the cursor / key to select “RESET.”
The horizontal frequency of the present incoming signal
appears under the title “RESET.”
3 Press and hold down the cursor + key for more than three
seconds until “COMPLETE” appears instead of the hori-
zontal frequency.
Resetting the present settings and all the
custom memories to factory settings
Note
If you carry out this procedure, not only the custom memories but also
all the menu items except for “LAMP USAGE,” and “LANGUAGE”
will be reset.
1 Carry out steps 1 to 4 in “Storing the most recent settings”
on the previous page.
2 Press the cursor / key to select “ALL RESET.”
3 Press and hold down the cursor + key for more than three
seconds until “COMPLETE” appears under the title
“ALL RESET.”
Adjusting the
picture elements
The picture elements such as brightness, contrast, white balance,
and so on can be adjusted individually for each input source. The
adjustable items vary depending on the input source and “INPUT
MODE” setting (see page 24).
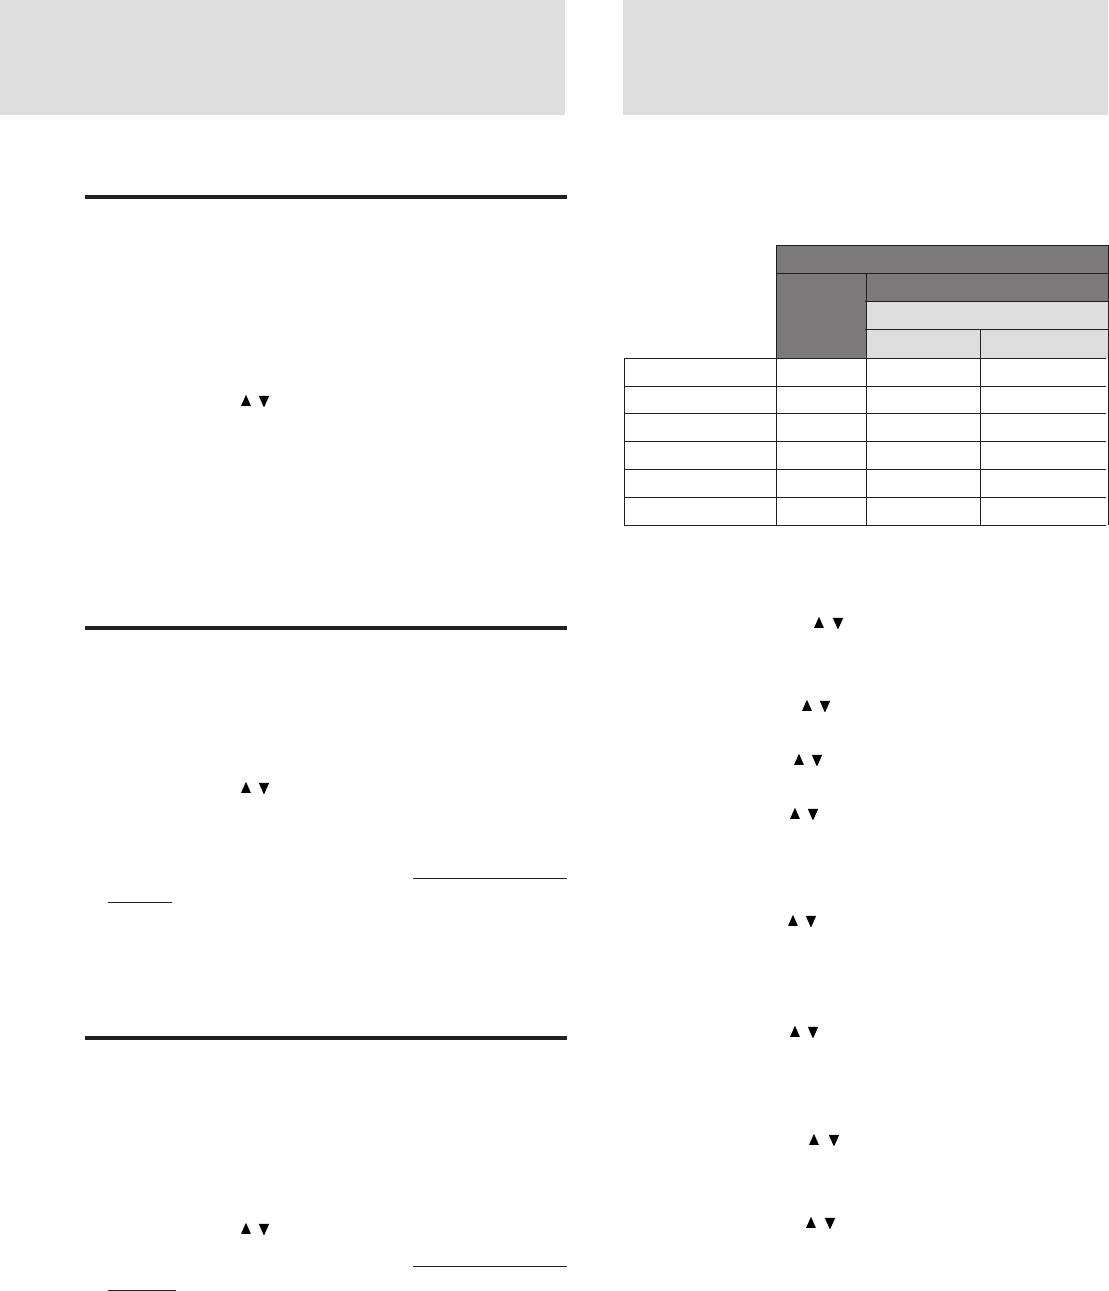
BRIGHTNESS • • •
CONTRAST • • •
COLOR • – •
TINT • – •
SHARPNESS • – –
WHITE BALANCE • • •
1 Select the input source (see page 16 or 21).
2 Press MENU to display the main menu.
3 Press the cursor / key to select “IMAGE ADJ
MENU.”
4 Press L-CLICK to display the IMAGE ADJ MENU.
5 Press the cursor / key to select “BRIGHTNESS,”
then press the cursor +/– key to adjust the brightness.
6 Press the cursor / key to select “CONTRAST,” then
press the cursor +/– key to adjust the contrast.
7 Press the cursor / key to select “COLOR,” then press
the cursor +/– key to adjust the color.
If the input source is RGB and “INPUT MODE” is
“RGB,” skip this step and go to step 10.
8 Press the cursor / key to select “TINT,” then press the
cursor +/– key to adjust the tint.
Note
The tint control doesn’t operate with a PAL or SECAM source.
9 Press the cursor / key to select “SHARPNESS,” then
press the cursor +/– key to adjust the sharpness.
If the input source is RGB, skip this step and go to the
next step.
10 Press the cursor / key to select “WHITE BAL-
ANCE,” then press L-CLICK.
The WHITE BALANCE menu appears.
11 Press the cursor / key to select each item in the
WHITE BALANCE menu, then press the cursor +/– key
to adjust the item for the white color balance.
(The elements
marked with “•” are
adjustable.)
Input source
VIDEO
S-VIDEO
RGB
INPUT MODE (See page 24.)
RGB
YCbCr


