Print Server Manual 27 A741
6 Direct printing from AutoCAD
With version 1.5x of the A741 Repro software it will be possible to print directly from AutoCAD to
a A741 printer. Please use the setup procedure below to do the right set-up.
•
Start AutoCAD (or AutoCAD Lite)
•
Select the File->printer Setup menu
•
For an existing printer select Modify->Reconfiguration.
•
To add a new printer select ‘Add’, from the list of available manufacturers select the Hewlett
Packard HP-GL/2 drivers
•
Then select the HP DesignJet 650C
•
Connect the plotter to a Network connection. From the browse window shown, select the
desired A741 Repro Server and then the (shared) A741 printer.
Normally this would end the printer setup. However some additional changes can be made,
suggestions to change:
•
Write to plot file: NO
•
Size units: Millimeters
•
Maximum paper size: A1
•
Remove hidden lines: Yes
The user can now use the normal File->Print option to print the AutoCAD file.
HINT: make sure the A741 Repro is in the network mode, if not the plots are stored in the
‘Network Spool’ directory and will not print until the A741 Repro is switched to network mode.
From AutoCAD the user can select the desired output size. The A741 Repro will automatically
use the roll of paper best suited for the job. If you want to have specific control of roll selection,
image rotation etc. then print to file and manually import the drawing in the Client window and
print from here.
HINT: For direct printing from AutoCAD on Client stations it is not necessary to have the Client
software installed or running on that client station.
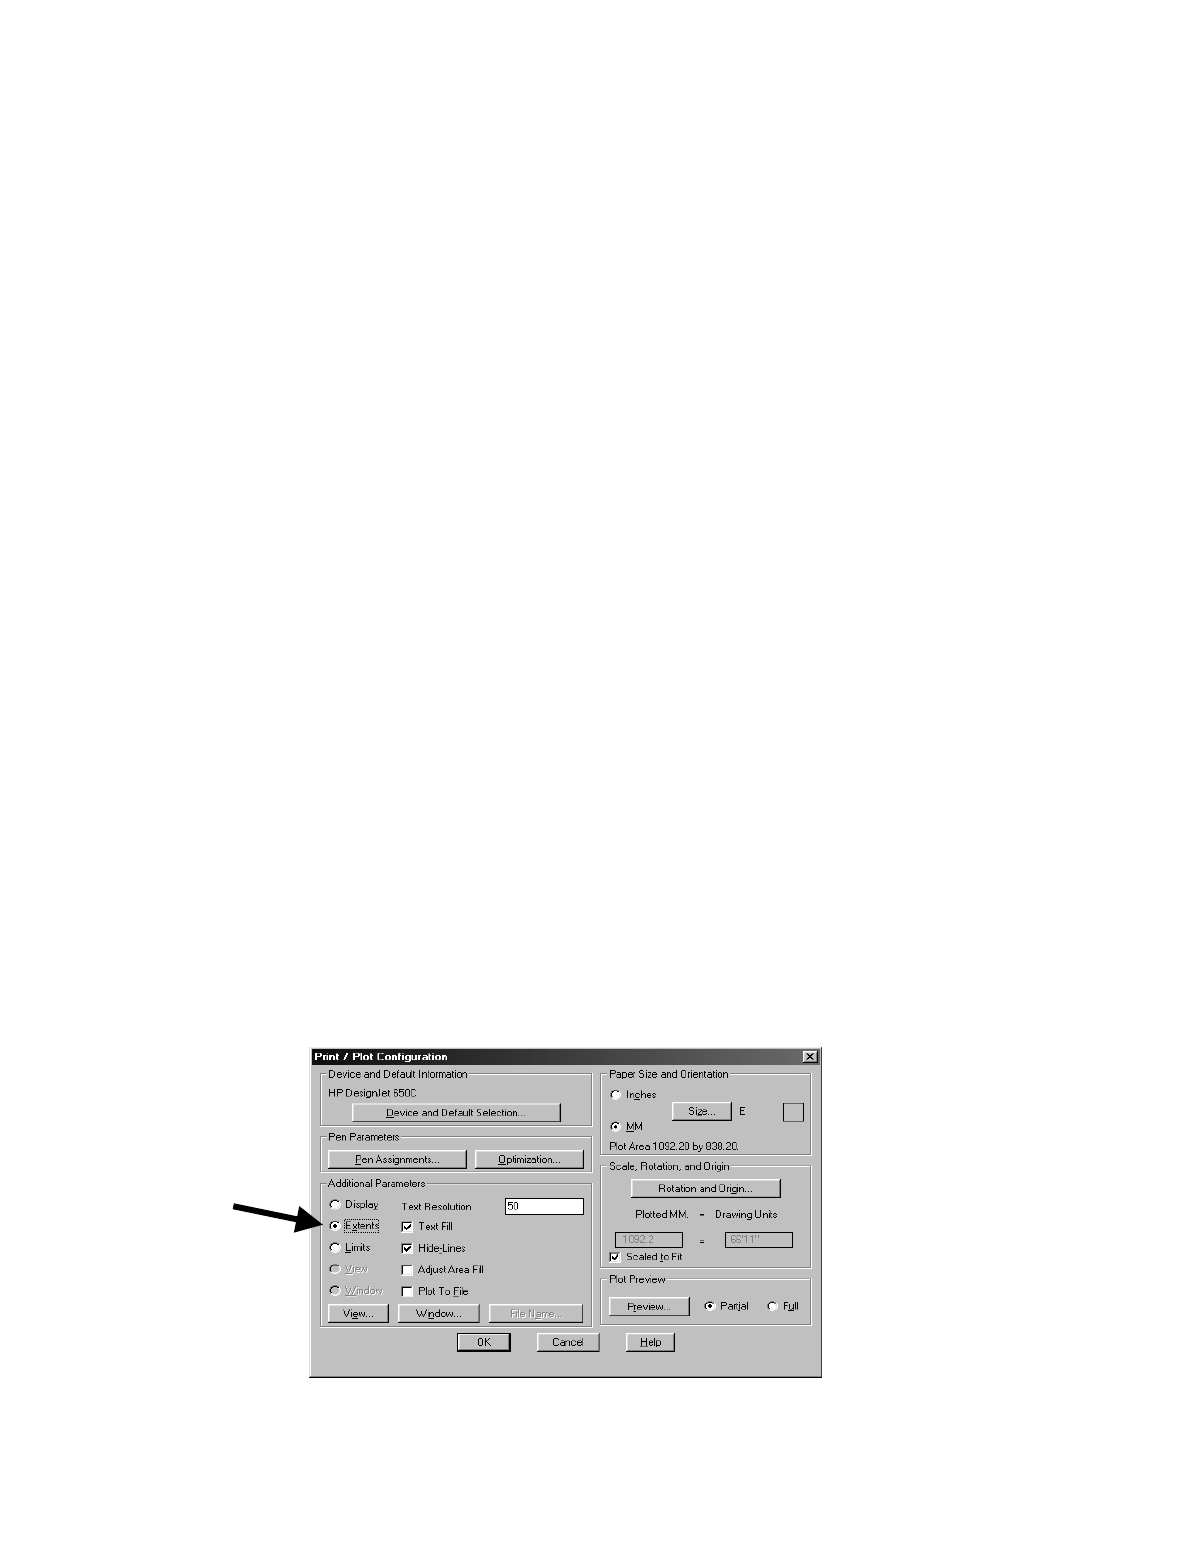
Sometimes printing from AutoCAD will not show the full drawing. This is no problem from A741
Repro, but is a setting from AutoCAD. After selecting the ‘File->Print’ menu, make sure the
‘Extents’ option is selected in the Additional Properties (see below). Also make sure the AutoCad
drawing is in paper space before printing.


