


Faxing
(Only for SCX-4521F/ SCX-4521FR)
7.11
Sending a Delayed Fax
You can set your machine to send a fax at a later time when you
will not be present.
1
Load the document(s) face up into the ADF.
OR
Place a single document face down on the document
glass.
For details about loading a document, see “Loading a
Document” on page 7.3.
2
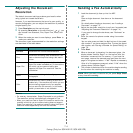
Adjust the document resolution to suit your fax needs (see
“Adjusting the Document Resolution” on page 7.4).
If you need to change the darkness, see “Darkness” on
page 7.2.
3
Press
Menu
until “Fax Feature” appears on the top line of
the display. The first available menu item, “DelayFax”
displays on the bottom line.
4
Press
Enter
.
5
Enter the number of the receiving machine using the
number keypad.
You can also press and hold the digit button of the speed
dial number if you have assigned one. To store the speed
dial number, see “Storing a Number for Speed Dialing” on
page 7.8.
6
Press
Enter
to confirm the number on the display. The
display asks you to enter another fax number to which to
send the document.
N
OTE
: The Another No. prompt does not appear if you have
added numbers for another broadcast or delay fax job. You
must wait until the job is completed.
7
To enter more fax numbers, press
1
to select “Yes” and
repeat steps 5 and 6. You can add up to 10 destinations.
Note that you can input group dial numbers only once at
first.
8
When you finish entering fax numbers, press
2
to select
“No
”
at the Another No. prompt.
The display asks you to enter a name.
9
To assign a name to the transmission, enter the name you
want. For details about entering characters, see “Entering
Characters Using the Number Keypad” on page 2.9.
If you do not want to assign a name, skip this step.
10
Press
Enter
. The display shows the current time and asks
you to enter the starting time when the fax is to be sent.
11
Enter the time using the number keypad.
To select “AM” or “PM” for 12-hour format, press the or
button or any number button.
If you set a time earlier than the current time, the
document will be sent at that time on the following day.
12
Press
Enter
when the starting time displays correctly.
13
The document is scanned into memory before
transmission. The display shows memory capacity and the
number of pages being stored in memory.
For a document placed on the document glass, the display
asks if you want to load another page. Select “1:Yes” to
add. Otherwise, select “2:No”.
14
The machine returns to Standby mode. The display
reminds you that you are in Standby mode and that a
delayed fax is set.
N
OTE
: If you want to cancel the delayed transmission, see
“Canceling a Scheduled Fax” on page 7.12.
Sending a Priority Fax
Using the Priority Fax feature, a high priority document can be
sent ahead of reserved operations. The document is scanned
into memory and transmitted when the current operation is
finished. In addition, priority transmission will interrupt a
broadcast operation between stations (i.e., when the
transmission to station A ends, before transmission to station B
begins) or between redial attempts.
1
Load the document(s) face up into the ADF.
OR
Place a single document face down on the document
glass.
For details about loading a document, see “Loading a
Document” on page 7.3.
2
Adjust the document resolution to suit your fax needs (see
“Adjusting the Document Resolution” on page 7.4).
If you need to change the darkness, see “Darkness” on
page 7.2.
3
Press
Menu
until “Fax Feature” appears on the top line of
the display.
4
Press the scroll button ( or ) to display “Priority Fax” on
the bottom line and press
Enter
.
5
Enter the number of the receiving machine using the
number keypad.
You can also press and hold the digit button of the speed
dial number if you have assigned one. To store the speed
dial number, see “Storing a Number for Speed Dialing” on
page 7.8.
6
Press
Enter
to confirm the number. The display asks you
to enter a name.
7
To assign a name to the transmission, enter the name you
want. For details about entering characters, see “Entering
Characters Using the Number Keypad” on page 2.9.
If you do not want to assign a name, skip this step.