


Unit 6: Maintenance
LM408-412e Operator Manual
6-6 PN: 9001155A
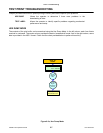
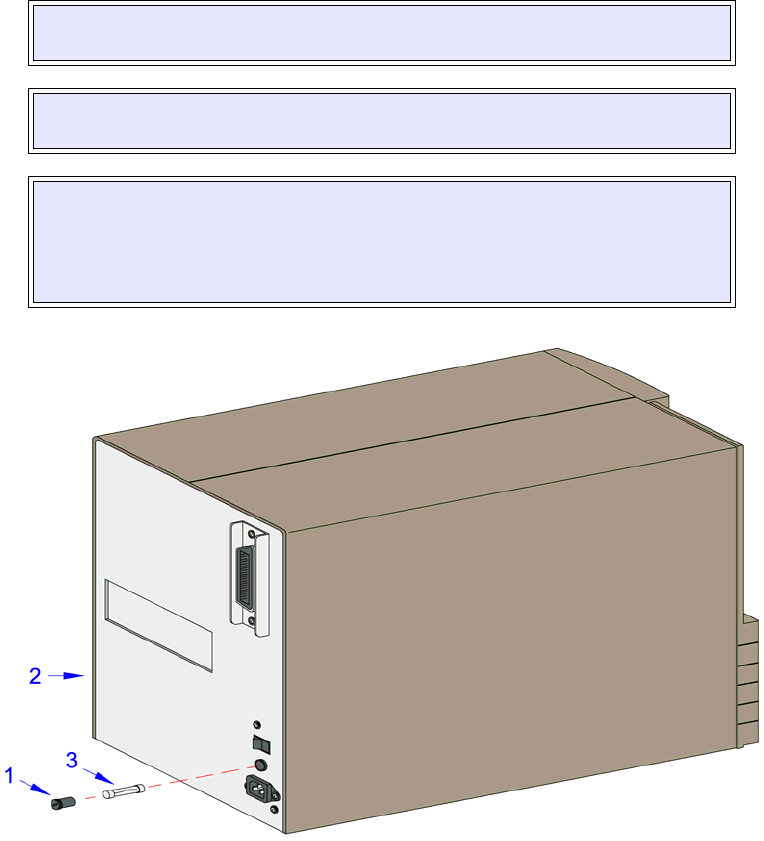
FUSE REPLACEMENT
The fuse is wired to the power receptacle and protects the printer from power surges from the electrical source. If a
surge of electricity reaches the fuse, its filiment will melt creating a disruption of the flow. In order to bridge the gap
so the printer may again be functional, the damaged fuse must be replaced.
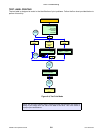
1. Switch off the printer and disconnect power supply cord.
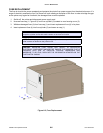
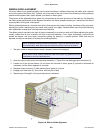
2. Unscrew fuse cap (1, Figure 6-3) from fuse cylinder (2) located on rear housing cover (3).
3. Withdraw damaged fuse (4) from fuse cap (1) and insert replacement fuse (4) in its place.
4. Insert replacment fuse (4) into fuse cylinder (2) and screw on cap (1).
Figure 6-3, Fuse Replacement
NOTE: The orientation of the fuse does not matter. It only has to be installed into its
respective cylinder and be able make contact on each end to function.
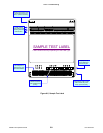
NOTE: Fuse amperage and voltage rating may be found stamped into the fuse’s
metal contacts or labeled on the printer’s rear.
CAUTION: IMPROPER FUSE USAGE MAY RESULT IN DESTROYED
ELECTRICAL COMPONENTS AND/OR FIRE. ENSURE THE DAMAGED FUSE IS
REPLACED WITH ONE OF IDENTICAL PHYSICAL DIMENSIONS AND
AMPERAGE. TO DO THIS, DUPLICATE THE INFORMATION STAMPED ON THE
FUSE’S METAL CASING.