-13
Introduction
Using the Remote Control
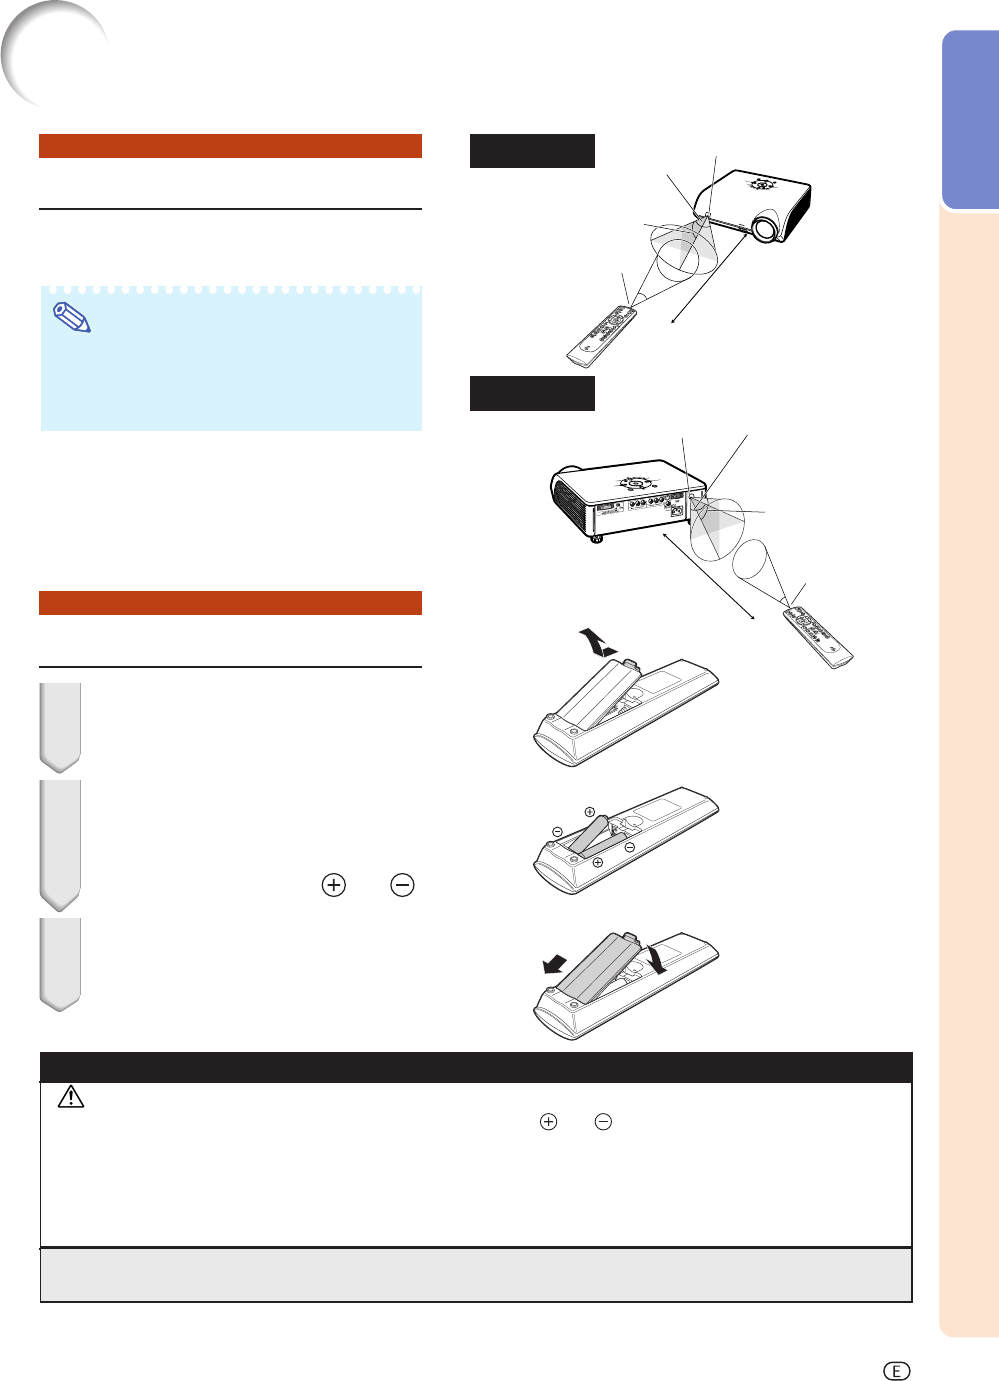
Inserting the Batteries
1 Pull down the tab on the cover
and remove the cover towards
the direction of the arrow.
2 Insert the included batteries
(two “AA” size).
•Insert the batteries making sure the po-
larities correctly match the
and
marks inside the battery compartment.
3 Insert the lower tab of the cover
into the opening, and lower the
cover until it clicks in place.
Incorrect use of the batteries may cause them to leak or explode. Please follow the precautions below.
Caution
• Insert the batteries making sure the polarities correctly match the and marks inside the battery compartment.
• Batteries of different types have different properties, therefore do not mix batteries of different types.
• Do not mix new and old batteries.
This may shorten the life of new batteries or may cause old batteries to leak.
• Remove the batteries from the remote control once they have run out, as leaving them in can cause them to leak.
Battery fluid from leaked batteries is harmful to skin, therefore ensure to first wipe them and then remove them using a cloth.
• The batteries included with this projector may run down in a short period, depending on how they are kept.
Ensure to replace them as soon as possible with new batteries.
Usable Range
The remote control can be used to control the
projector within the ranges shown in the
illustration.
Note
•
The signal from the remote control can be re-
flected off a screen for easy operation. How-
ever, the effective distance of the signal may
differ depending on the screen material.
When using the remote control:
•Ensure not to drop, expose to moisture or high
temperature.
•The remote control may malfunction under a
fluorescent lamp. In this case, move the pro-
jector away from the fluorescent lamp.
Remote control sensor
Remote
control
signal
transmitters
Remote control
23' (7 m)
30°
30°
30°
Front View
Remote control
30°
30°
Remote control sensor
23' (7 m)
Remote
control
signal
transmitters
30°
Rear View
DT400_E_P06_15.p65 04.10.18, 1:14 PM13


