


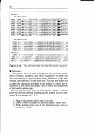
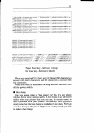


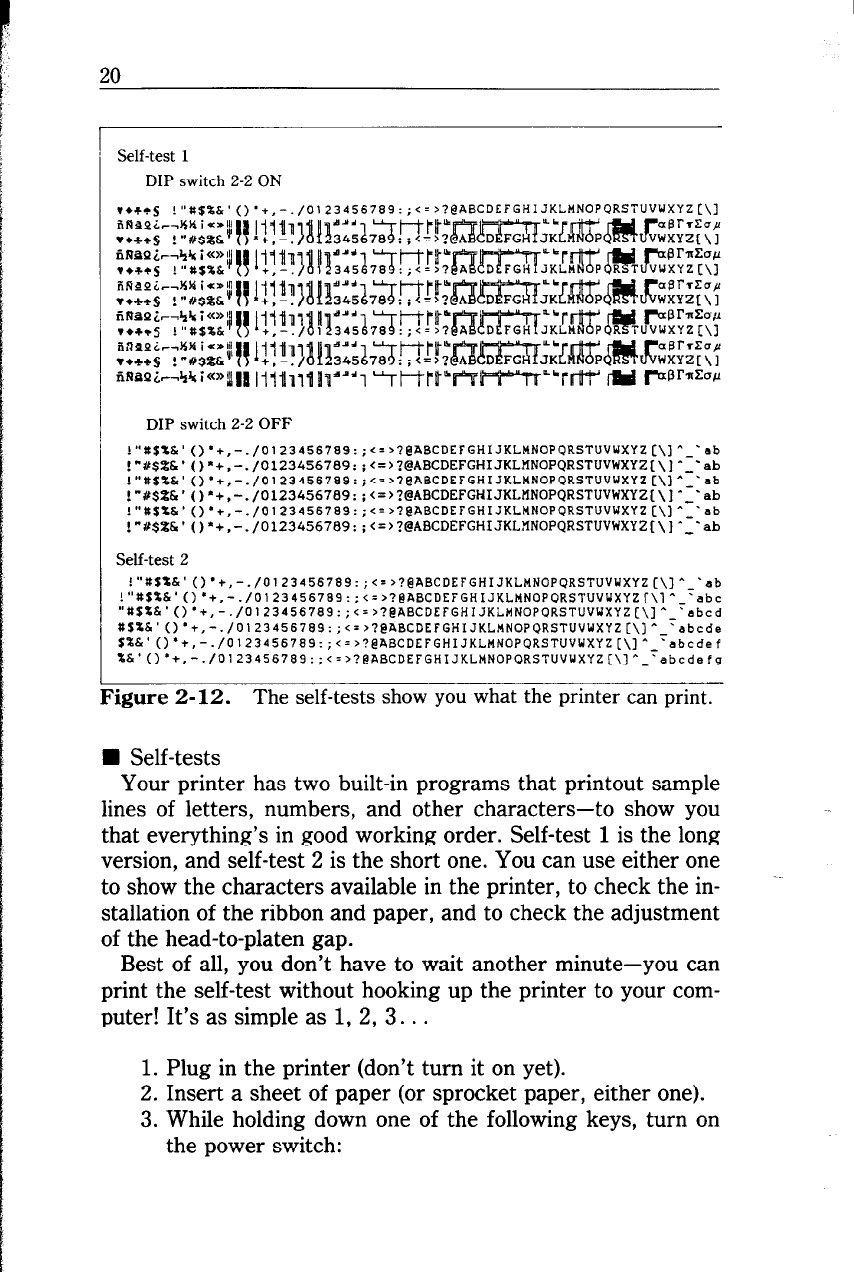
Self-test 1
DIP switch 2-2 ON
‘+,-./0123456769:;<=,?BABCDEFGHIJKLMNOPORSTUVWXYZ[\]
DIP switch 2-2 OFF
!“t$t&‘()*+,-./0123456784:;~=~?@ABCDEFGHIJKLMNOPORSTUVWXYZ[\]~~~~b
!“Y$%h’()“+,-./0123456709:,
.<=>?@ABCDEFGHIJKLtlNOPQRSTUVWXYZ[\]---ab
!“tSt&‘()*+,-./0123456789:;<.,7eABCDEFGHIJKLMNOPQRSTUVWXYZ[\]-~~8b
!“#S%h’()g+,-./01234S6709:,
*<=>?@ABCDEFGHIJKLtlNOPQRSTUVWXYZ[\]- ‘ab
!“~$tb’()~+,-./0123456789:;<=>?@ABCDEFGHIJKLMNOP~RSTUVWXYZ[\]-~~~b
!“#$X&‘()‘+.-./0123456789:
;<=>?@ABCDEFGHIJKL?lNOPQRSTUVWXY'Z[\]---cab
Self-test 2
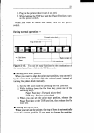
‘igure 2-12. The self-tests show you what the printer can print.
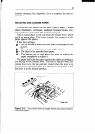
n Self-tests
Your printer has two built-in programs that printout sample
lines of letters, numbers, and other characters-to show you
that everything’s in good working order. Self-test 1 is the long
version, and self-test 2 is the short one. You can use either one
to show the characters available in the printer, to check the in-
stallation of the ribbon and paper, and to check the adjustment
of the head-to-platen gap.
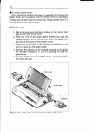
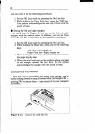
Best of all, you don’t have to wait another minute-you can
print the self-test without hooking up the printer to your com-
puter! It’s as simple as 1, 2, 3. . .
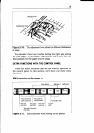
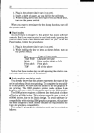
1. Plug in the printer (don’t turn it on yet).
2. Insert a sheet of paper (or sprocket paper, either one).
3. While holding down one of the following keys, turn on
the power switch: