


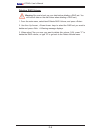

D-4
X7DA3+ User's Manual
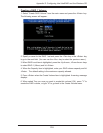
2. Specify a name for the RAID 0 set and press the <Tab> key or the <Enter> key
to go to the next fi eld. (You can use the <Esc> key to select the previous menu.)
3. When RAID Level item is highlighted, press the <Up Arrow>, <Down Arrow> keys
to select RAID 0 (Stripe) and hit <Enter>.
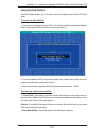
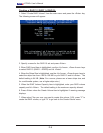
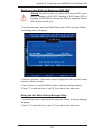
4. When the Disks item is highlighted, press <Enter> to select the HDD to confi gure
as RAID. The following pop-up screen (See the note on Page D-3) displays:
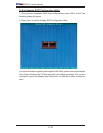
5. Use the <Up Arrow>, <Down Arrow> keys to highlight a drive and press <Space>
to select it. A triangle appears to confi rm the selection of the drive.
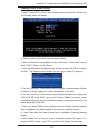
6. Use the <Up Arrow>, <Down Arrow> keys to select the stripe size, ranging from
4 KB to 128 KB for the RAID 0 array, and hit <Enter>. Note: For a server, please
use a lower stripe size, and for a multimedia system, use a higher stripe size. The
default stripe size is 128 KB.)
7. Press <Enter> when the Create Volume item is highlighted. A warning message
displays.
8. When asked "Are you sure you want to create this volume (Y/N), press "Y" to
create the RAID volume, or type "N" to go back to the Create Volume menu.
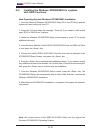
Creating a RAID 0 Volume:
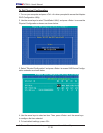
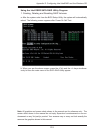
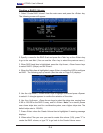
1. Select "Create RAID Volume" from the main menu and press the <Enter> key.
The following screen will appear: