18
Once the TMS Exchange Integration component is installed on the Exchange
server, three important steps need to be done in order to make the installation
complete.
Publish the provided Videoconference form.
Create Exchange User representations for each system registered in TMS
Start Synchronizer to import existing TMS booking entries for
videoconference systems
Publish the provided Videoconference Form
A custom appointment form that adds support for videoconference meetings is
provided as part of the release from TANDBERG. It is recommended to place
this form under Organizational Forms Library in order to be made available
for all the Exchange end-users in your network. If an Organizational Forms
Library already exists on your Exchange server, this one can be used (make
sure permissions are set as described in the following chapter). If not, one has
to be created before importing the custom form. Please see www.microsoft.
com/exchange for more information about Microsoft Exchange.
Creating Organization Forms Library
Be sure you are logged in with full Exchange administrator rights. Go to ‘Ad-
ministrative Groups’ and then select the group containing the Exchange Server
on which you just installed the Exchange Integration component. Normally this
would be ‘Administrative Groups/First Administrative Group’.
Select ‘Folders’ followed by ‘Public Folder’. Right-click on ‘Public Folder’ and
select ‘View System Folders’.
‘Folders’ may reside on root level if the Exchange System Manger is not
congured to show administrative groups.
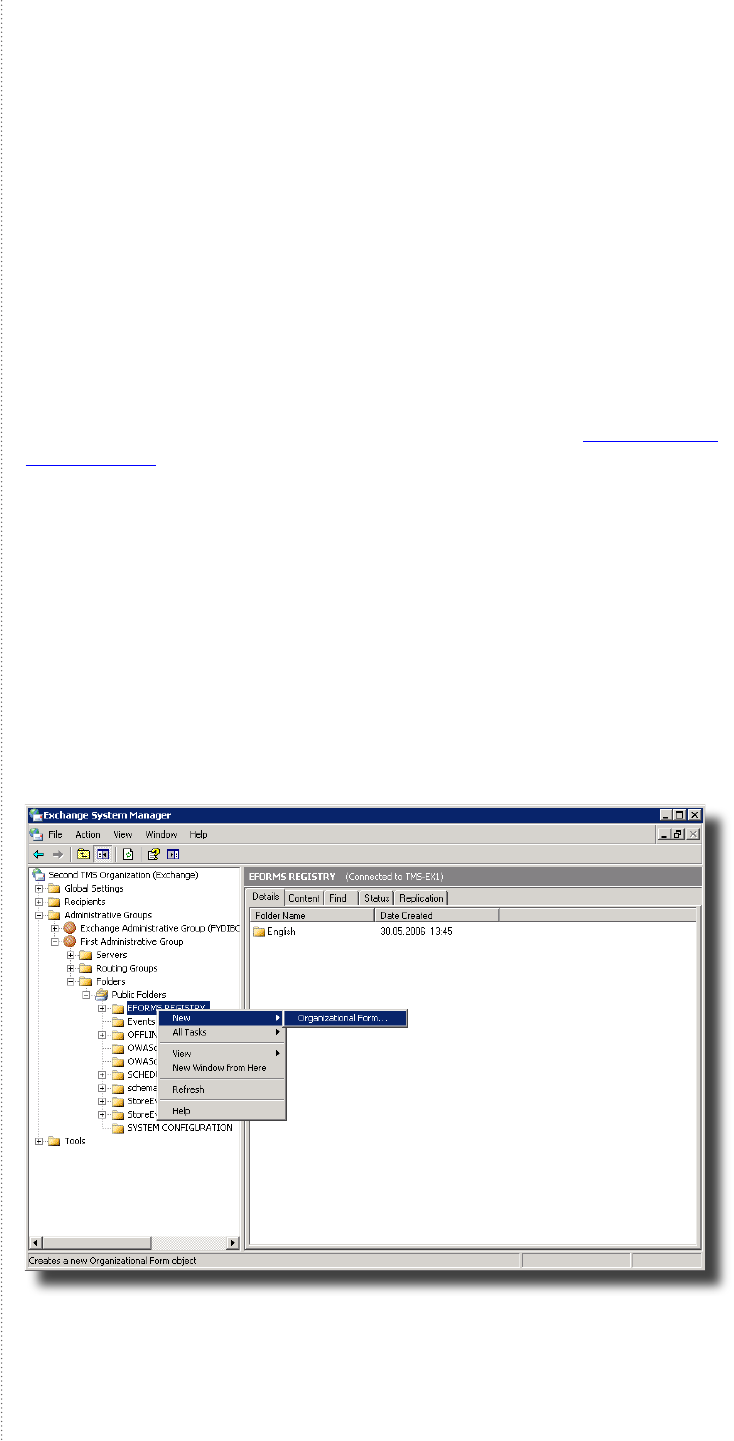
While viewing the System Folders, right-click on ‘EFORMS Registry’ and select
‘New->Organizational Form’
A property page for the new Organizational Form library will be displayed. Fill in
a suitable name and (optional) description of the Organizational Forms Library.
Choose ‘English (USA) as E-forms language. If a Forms Library has already
been created with E-forms language ‘English (USA)’, the form must be pub-
lished in this library.
1.
2.
3.
Post installation setup
