


3. REPLACING THE IMPORTANT PARTS EO18-33025
(Revision Date: Mar. 27, 2009)
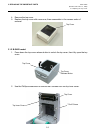
3.5 Replacing the Print Head Ass’y
3-11
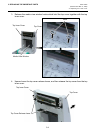
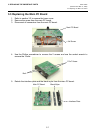
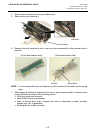
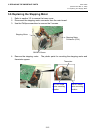
4. Remove the connector from the print head ass’y.
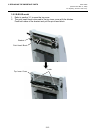
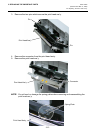
5. Remove the print head ass’y.
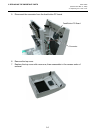
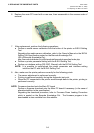
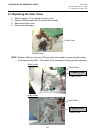
6. Replace the print head ass’y with a new one, then reassemble in the reverse order of
removal.
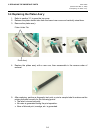
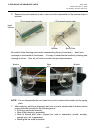
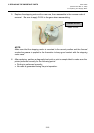
[ Print head element side ] [ Print head bracket side ]
NOTE: Do not disassemble the print head ass'y which contains the bracket and the spring
plate.
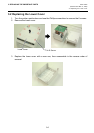
7. After replacing, perform a diagnostic test print or print a sample label to make sure the
printer performs correctly for the following points.
• Printing is performed correctly.
• None of dot missing is generated.
• None of blurred print, stain, chipped bar code or characters, wrinkle, smudge,
uneven print, etc. is generated.
• Reading the bar code is possible.
Connecto
r
Print Head Ass’y
Spring Plate
Bracket