


5 CONFIGURING NETWORKS (EQUIPMENT)
34 Ethernet Configuration
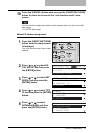
7
Press the [ENTER] button.
The screen returns to the shown in step 5.
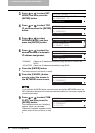
10
Press the [CANCEL] button once or press the [FUNCTION CLEAR]
button to return the screen to the “user function mode” main
screen.
If the network connection is still unstable even after following the procedure above, turn
the power of this equipment OFF and then back ON.
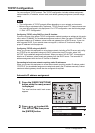
AUTO: Detects the Ethernet link speed automatically.
10BASE/HALF: Uses 10BASE-T half-duplex communication mode.
10BASE/FULL: Uses 10BASE-T full-duplex communication mode.
100BASE/HALF: Uses 100BASE-TX half-duplex communication mode.
100BASE/FULL: Uses 100BASE-TX full-duplex communication mode.
y When you select other than AUTO above, refer to the specifications of the network
to which this equipment is connected.
y If you are not sure of the most appropriate link speed or communication mode,
select AUTO.
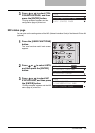
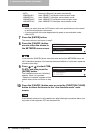
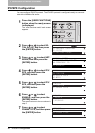
8
Press the [CANCEL] button
once to return the screen to
the NETWORK menu screen.
If you press the [CANCEL] button more than twice and exit the NETWORK menu, the
NIC initialization operation in the next step becomes ineffective. In this case, repeat the
procedure from step 1.
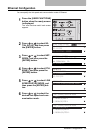
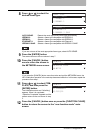
9
Press or to select COM-
PLETE, and then press the
[ENTER] button.
The initialization starts and “Initializing”
appears. When it is completed,
“Operation Completed” appears and the
screen returns to the one shown in step
3.
NETWORK
01.COMPLETE
02.ETHERNET
03.TCP/IP
NETWORK
01.COMPLETE
02.ETHERNET
03.TCP/IP