


5 CONFIGURING NETWORKS (EQUIPMENT)
38 TCP/IP Configuration
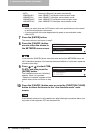
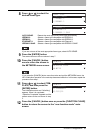
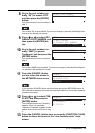
6
Press or to select
STATIC IP, and then press the
[ENTER] button.
The screen returns to the one shown in
step 5.
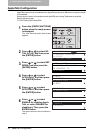
7
Press or to select IP
ADDRESS, and then press the
[ENTER] button.
8
Enter the IP address, and then
press the [ENTER] button.
The screen returns to the one shown in
step 7.
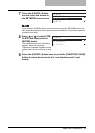
9
Press or to select SUB-
NET MASK, and then press the
[ENTER] button.
10
Key in the subnet mask value
as required, and then press the
[ENTER] button.
The screen returns to the one shown in
step 9.
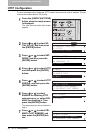
11
Press or to select
DEFAULT GATEWAY, and then
press the [ENTER] button.
12
Key in the default gateway
value as required, and then
press the [ENTER] button.
13
Press the [CANCEL] button
once to return the screen to
the NETWORK menu screen.
If you press the [CANCEL] button more than twice and exit the NETWORK menu, the
NIC initialization operation in the next step becomes ineffective. In this case, repeat the
procedure from step 1.
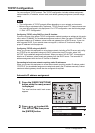
ADDRESS MODE
1.STATIC IP
2.DYNAMIC
3.NO AUTOIP
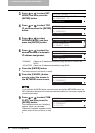
TCP/IP
01.ADDRESS MODE
02.IP ADDRESS
03.SUBNET MASK
IP ADDRESS
XXX
.
XXX.XXX.XXX
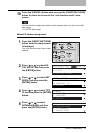
TCP/IP
01.ADDRESS MODE
02.IP ADDRESS
03.SUBNET MASK
SUBNET MASK
XXX
.
XXX.XXX.XXX
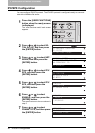
TCP/IP
02.IP ADDRESS
03.SUBNET MASK
04.DEFAULT GATEWAY
DEFAULT GATEWAY
XXX
.
XXX.XXX.XXX
NETWORK
01.COMPLETE
02.ETHERNET
03.TCP/IP