


IPX/SPX Configuration 41
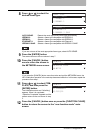
9
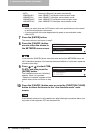
Press the [ENTER] button.
The screen returns to the one shown in step 7.
12
Press the [CANCEL] button once or press the [FUNCTION CLEAR]
button to return the screen to the “user function mode” main
screen.
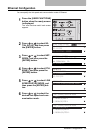
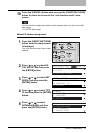
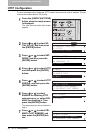
8
Press or to select the
desired frame type.
AUTO SENSE: Detects the most appropriate frame type automatically.
IEEE802.2: Selects a frame type compatible with IEEE802.2.
IEEE802.3: Selects a frame type compatible with IEEE802.3.
ETHERNET II: Selects a frame type compatible with Ethernet II.
IEEE802.3 SNAP: Selects a frame type compatible with IEEE802.3 SNAP.
If you are not sure of the most appropriate frame type, select AUTO SENSE.
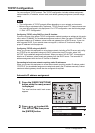
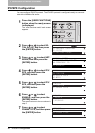
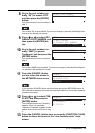
10
Press the [CANCEL] button
once to return the screen to
the NETWORK menu screen.
If you press the [CANCEL] button more than twice and exit the NETWORK menu, the
NIC initialization operation in the next step becomes ineffective. In this case, repeat the
procedure from step 1.
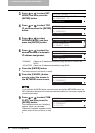
11
Press or to select COM-
PLETE, and then press the
[ENTER] button.
The initialization starts and “Initializing”
appears. When it is completed,
“Operation Completed” appears and the
screen returns to the one shown in step
3.
FRAME TYPE
1.AUTO SENCE
2.
IEEE802.2
3.
IEEE802.3
FRAME TYPE
3.
IEEE802.3
4.
ETHERNET
II
5.
IEEE802.3 SNAP
NETWORK
04.IPX/SPX
05.APPLE TALK
06.HTTP
NETWORK
01.COMPLETE
02.ETHERNET
03.TCP/IP