


3. PRINTER OPERATION
EO1-33029
3.3 Installing the Printer Drivers
3- 8
3.3.4 Add Printers (Cont.)
3.3.5 Uninstalling the TEC
B-852 Printer Driver
4.
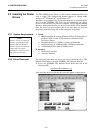
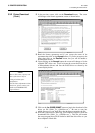
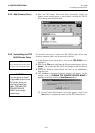
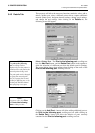
After the TEC Printer Driver has been successfully loaded, the
Printers screen should appear as shown below, showing the TEC B-
852 as being successfully installed.
If it becomes necessary to remove the TEC B-852 printer driver from
your host computer, then it can be removed as follows.
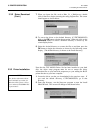
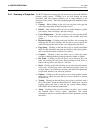
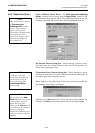
1.
In the Printers screen shown above, click on the
TEC B-852
icon to
highlight it.
2.
Click on the
File
menu, and when the File sub menu appears, click on
Delete
. The icon for the TEC B-852 will disappear from the Printers
screen.
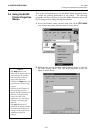
3.
Access the Windows Control Panel and click on the Add/Remove
Programs icon.
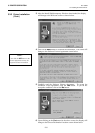
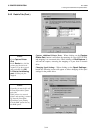
4.
The Add/Remove Program Properties window will appear. In this
window, click on
TOSHIBA TEC PRINTER DRIVER MONO
to
highlight it and then click on the
Add/Remove
button.
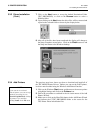
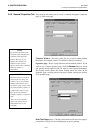
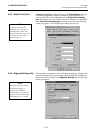
5.
In the Confirm File Deletion screen that appears, click on the
Yes
button to complete the removal of the TEC Printer Driver.
NOTE:
D
o not uninstall the printer until
y
ou have closed all applications.
CAUTION!
If you are going to install
an upgraded version of the
TEC printer driver you
must first uninstall the
folder “TOSHIBA TEC
PRINTER DRIVER
MONO” by the steps
outlined here.