64
CONTENTS
Adjustments &
Settings
1
1
2,3
32
MENU
ON/STANDBYINPUT
L-CLICK R-CLICK
ENTER
KEYSTONE
AUTO
SET
EXIT
PIP
FREEZE
MUTECALL
RESIZE
VOLUME/ADJUST
TEMP LAMP ON
BUSY FAN
KEYSTONE
SET
AUTOAUTO
EXIT
ENTER
MENU
INPUT
VOL/ADJ.
TE
M
P
LA
M
P
O
N
B
U
S
Y
FA
N
O
N
/S
TA
N
D
B
Y
K
EYSTO
N
E
SET
A
U
TO
A
U
TO
EXIT
EN
TER
M
E
N
U
IN
PU
T
V
O
L/A
D
J.
ON/STANDBY
LASER
Preparation
1
Project a picture on the screen as explained in the step “Projection on the screen”.
28
Memory card
Contrast
Brightness
Input select mode
Auto. demo
Slide show
Interval
Screen size
Level
+6
0
[
ENTER
]
[
ENTER
]
Full Thru
Manual Auto.
Off On
Manual Auto.
Picture
MENUMENU EXIT
QUICK
Page
Item
Adjust
Quit
Memory card
+6
0
0
MENU EXIT
QUICK MENU
Contrast
Brightness
Adjust the contrast of the image.
Picture mode
Lamp power
Keystone
Input source setting
Language
[
ENTER
]
[
ENTER
]
[
ENTER
]
Hi Low
Off On
FULL Item Adjust Quit
Auto. demo
Memory card
Display
Language
No signal background
Icon
Menu position
Menu background translucent
Start-up screen
Press the
[
ENTER
]
On Off
Logo
None
Blue background
On Off
On Off
MENU EXIT
QUICK
Item
Quit
Page
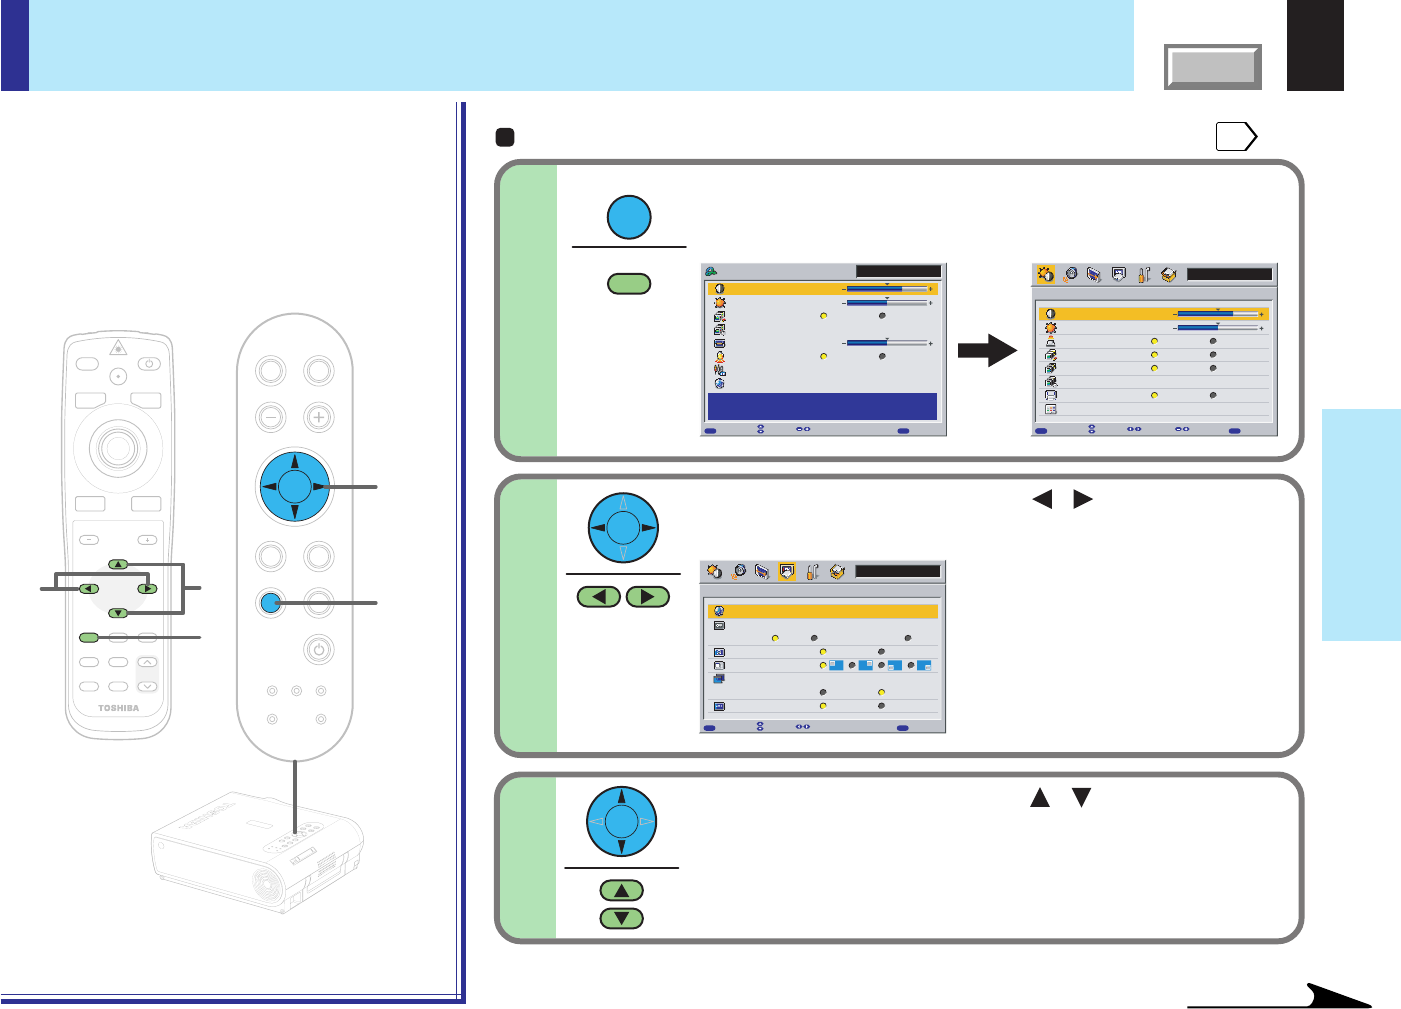
FULL MENU settings – Display
You can set the language, menu display and
start-up screen, etc.
1
MENU
MENU
2
Use the selection buttons ( / ) to display the
“Display” menu.
Use the selection buttons (
/ ) to select the
setting items.
3
Continued
Remote control
Control panel
(Main unit side)
Press MENU twice.
When pressed once, the QUICK MENU screen appears. When
pressed twice, the “Picture” screen of the FULL MENU appears.


