Determining Telephone Line Type
The Superprint Pro80 LVD requires a standard (analog) telephone line with either pulse
or tone (also called touchtone) dialing. Some businesses use digital telephone systems. To
use the TTY in these businesses, some modifications to the telephone line are required. If
you are unsure of the type of telephone line you are using, contact your telephone
installer to verify that your line supports a standard, single-line telephone. This is the
same kind of line required by fax machines and computer modems.
Setting Pulse or Tone Dialing
The Superprint Pro80 LVD is preset to use tone dialing because this is used by most
telephone lines. If your line uses pulse dialing, you can change this setting (see “Dial
Using” on page 53).
Connecting a Telephone
The Superprint Pro80 LVD can share a telephone line with a voice telephone. This allows
for both voice and TTY calls on the same line. This feature is also helpful for using Voice
Carry Over (see Chapter 9). To connect a telephone on the same line as your TTY, simply
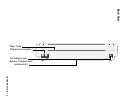
connect the telephone cord into the second phone jack on the back of the Superprint
Pro80 LVD.
Connecting a Signaler
A signaler can be used with the Superprint Pro80 LVD to help alert you to incoming
calls. You can connect a signaler to the second phone jack on the back of the TTY.
INSTALLING PRINTER PAPER
The printer uses high-quality thermal paper. Use the order card that comes with the
TTY to order more paper. If you do not have the card, contact your dealer or Ultratec
(the address is on the inside front cover of this manual).
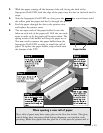
1. Take off the printer cover by lifting the back edge of the cover up toward the
keyboard then lifting the cover off. A new unit may not have the cover installed, in
which case you will find it elsewhere inside the box.
Before Loading Paper:
First, notice how the paper holder is installed. This holder may come off
while loading the paper. Second, connect the power and phone line before
attempting to load the paper (see “Connecting Power & Phone Line” on page
9).
10 • SETUP


