Osprey 240e/450e User Guide
ViewCast 47
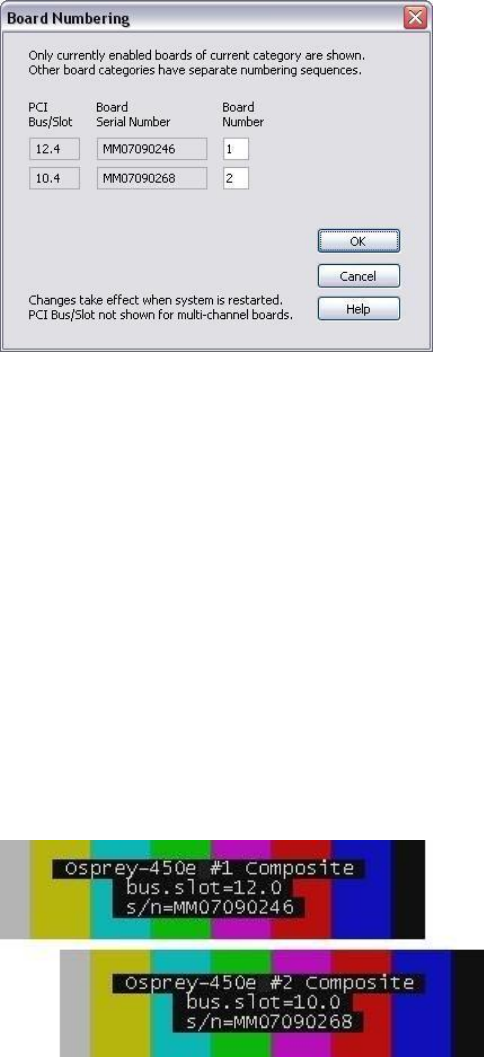
Figure 43. Board Numbering
Each line represents the information for one Osprey board. Only boards that are currently installed and
enabled are shown. Also, only boards of one type at a time are shown. For example, consider a system
with two Osprey-240e and two Osprey-450e boards. The two board types are numbered separately --
there is a board 1 and a board 2 of each kind. Which listing is shown depends on the context in which
you open the property pages. If you open them from an Osprey-240e context, you will see the two
Osprey-240e boards. If you open them from an Osprey-450e context, you will see the two Osprey-450e
boards.
The information for each board includes the PCI bus and device address on the left, the serial number in
the middle, and the current device number on the right. For boards such as the Osprey-450e which span
multiple PCI addresses, the PCI Bus/Slot information is not shown.
The device numbers are editable. You can assign each board any number from 1 to 8. All boards in the
current list must have different numbers. The numbers do not have to be in a packed sequence 1, 2, 3...
The easiest way to identify boards is to start all boards streaming, and remove the video sources so that
test patterns are shown (see Figure 44).
Figure 44. Test patterns
To set up the test patterns, enable the board ID information display by selecting Show board ID info on
the Device property tab. The information shown includes the PCI bus and slot for the board, and the
board's serial number, in the same format as the Board Numbering dialog.
When you have set the new board numbers and want to save them, click OK. The dialog will warn you if
the numbers are not in the allowed range 1..64, or if there are duplicates – you must correct these
