9
ViewSonic PJ500
Operations
Power ON
NOTE:
Refer to “Example of System Setup” on page 8.
1
Make sure the power cord is connected correctly and lens cap has been removed. Set the Power
Switch to [I] ON. The unit is now in Standby mode and the POWER indicator LED turns a steady
orange.
2
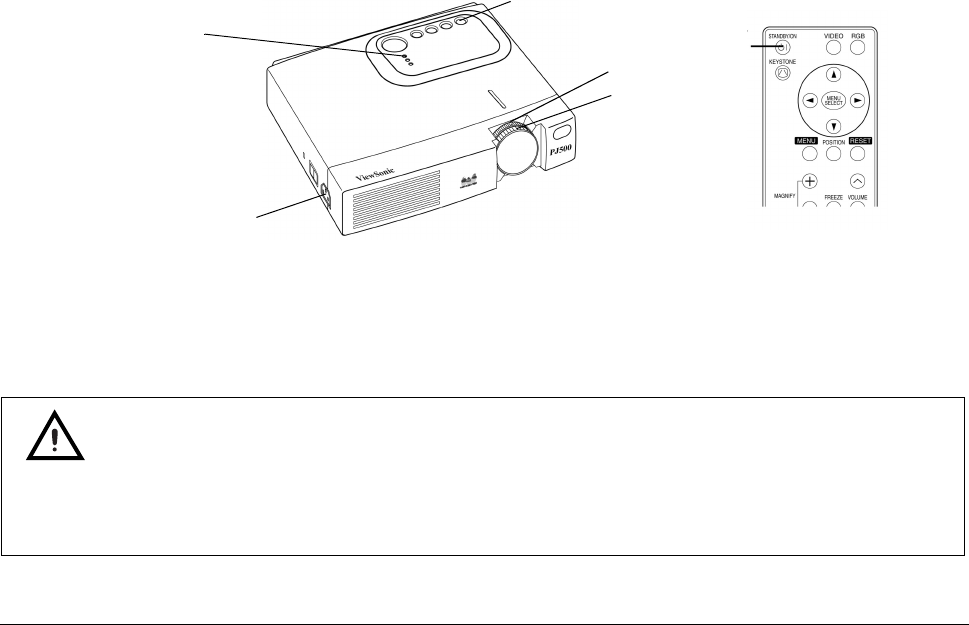
Press the STANDBY/ON button on the control panel or the remote control. Warm-up begins and
the power indicator blinks in green.
3
After several seconds the lamp will stop blinking and will turn to continuous green, indicating
that the projector is ready to use.
4
Adjust the size of the projected image with the Zoom knob.
5
Adjust focus using the Focus ring.
Power OFF
NOTE:
See Caution below.
1
Press the STANDBY/ON button & on the control panel or the remote control. The message
“POWER OFF?” will display on the screen, and the message will disappear in 5 seconds. During
this message indication, press the STANDBY/ON button again. The projector lamp shuts off and
lamp cooling begins. The POWER indicator blinks orange during lamp cooling. Pressing the
STANDBY/ON button has no effect while the POWER indicator is blinking.
2
The system assumes the Standby mode when cooling is complete. The POWER indicator ceases
blinking and changes to a steady orange. Check that the indicator is orange and set the POWER
switch to [O].
3
The POWER indicator turns off when the Power Switch is set to [O] OFF. Remember to replace
the lens cap after use.
NOTE:
Except in emergencies, do not turn off the Power Switch unless the POWER indicator is a
steady orange. Otherwise improper cooling of the lamp will reduce the life of the lamp or may
damage the lamp.
Figure 9: Power Buttons
CAUTION
• To turn OFF the projector press the Standby/ON button and hold for 2 seconds .
• The POWER LED on the control pad flashes orange during cool-down.
• Wait until the POWER LED changes to a steady orange before you set the Power Switch to [O] OFF.
Power Indicator
Standby/On Button
Zoom Knob
Focus Ring
Power Switch
Standby/On Button


