The image is reversed.
m The film is facing the wrong way.
Make sure the film is face down.
Color quality is unsatisfactory.
m All or part of the light correction zone has been obstructed.
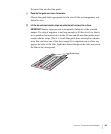
If the film is in a film guide, make sure the guide is positioned properly.
See “Inserting Film Into a Film Guide for Scanning,” earlier in this chapter.
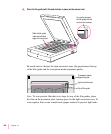
If you’re not using a film guide for positives, be sure to allow at least .59
inch (15-mm) of space between the top edge of the film and the top edge of
the document glass. (The space comprises the necessary light correction
zone.)
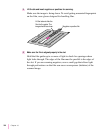
If you’re not using a film guide for negatives, be sure to allow space for the
light correction zone. In addition, be sure to mask the sides of your
negatives to avoid overexposure (halation). Use a black opaque material for
masking (something similar to the material in the film guides).
m You may have selected an inappropriate negative film type, producing
incorrect colors.
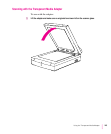
Choose the correct film type. For details, see “Scanning With the Adapter,”
earlier in this chapter.
m You may not have selected an appropriate ColorSync profile for the
medium you are scanning.
m Color OneScanner Flatbed for magazines, paper, other opaque originals
m Color OneScanner Positive for positive transparencies
m Color OneScanner Negative for negatives
Every time you change from one medium to another, you must select the
correct ColorSync profile. Choose ColorSync Preferences from the Image
menu. In the dialog box that appears, select the profile you want.
151
Using the Transparent Media Adapter


