


SUBMITTING PRINT JOBS USING WINDOWS NT 4.0 DRIVERS
GUIDE TO SUBMITTING JOBS FROM THE CLIENT 5-17
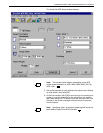
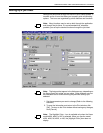
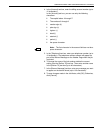
Setting the image shift
You can use the Image Shift option to offset the printed image from
the edges of the page. This is particularly useful for bound or drilled
jobs. The image shift setting is applied automatically to both sides of
the print for two-sided printing. When the Image Shift option is set
at 0 (zero), the image is not shifted in any direction.
1. From the DocuPrint NPS Setup window, set the unit of measure
by selecting the Preferences icon. Refer to the section “Setting
the preferences” for more information.
2. To specify a horizontal image shift, enter the number of units to
shift the image from the left edge of the page in the X text box.
A positive number shifts the image to the right, and a negative
number shifts the image to the left.
3. To specify a vertical image shift, enter the number of units to
shift the image from the top edge of the page in the Y text box.
A positive number shifts the image up, and a negative number
shifts the image down.
Note: An image shift set with the Image Shift option may interfere
with any binding offset set in the document file by the application.
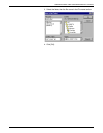
Specifying the paper weight
On the Paper Stocks window, enter the number of grams per square
meter in the [Weight] box. You can enter a number in the range 60 to
413. The default is 75 g/m
2
.
Programming the Main Stock (Stock 1)
This area allows you to specify the paper type, size and color. Refer
to the section “Specifying paper stocks” for detail.
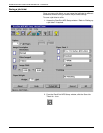
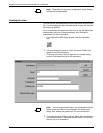
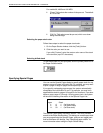
Selecting the finishing features
The finishing features that are available on your printer determine the
format of the completed print job. DocuPrint always collates the
pages of a document in sequential order unless “no collating” options
are selected.
1. From the DocuPrint NPS Setup window, click the [Finishing] list
box.
2. Click the option you want to use.
Note: [No Finishing] indicates that the document is not bound
or stapled.