


XES Synergix 8825/8830/8850/8855 Digital Solution User Guide 12
Getting to know the Synergix Digital Solution (continued)
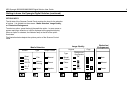
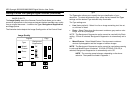
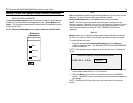
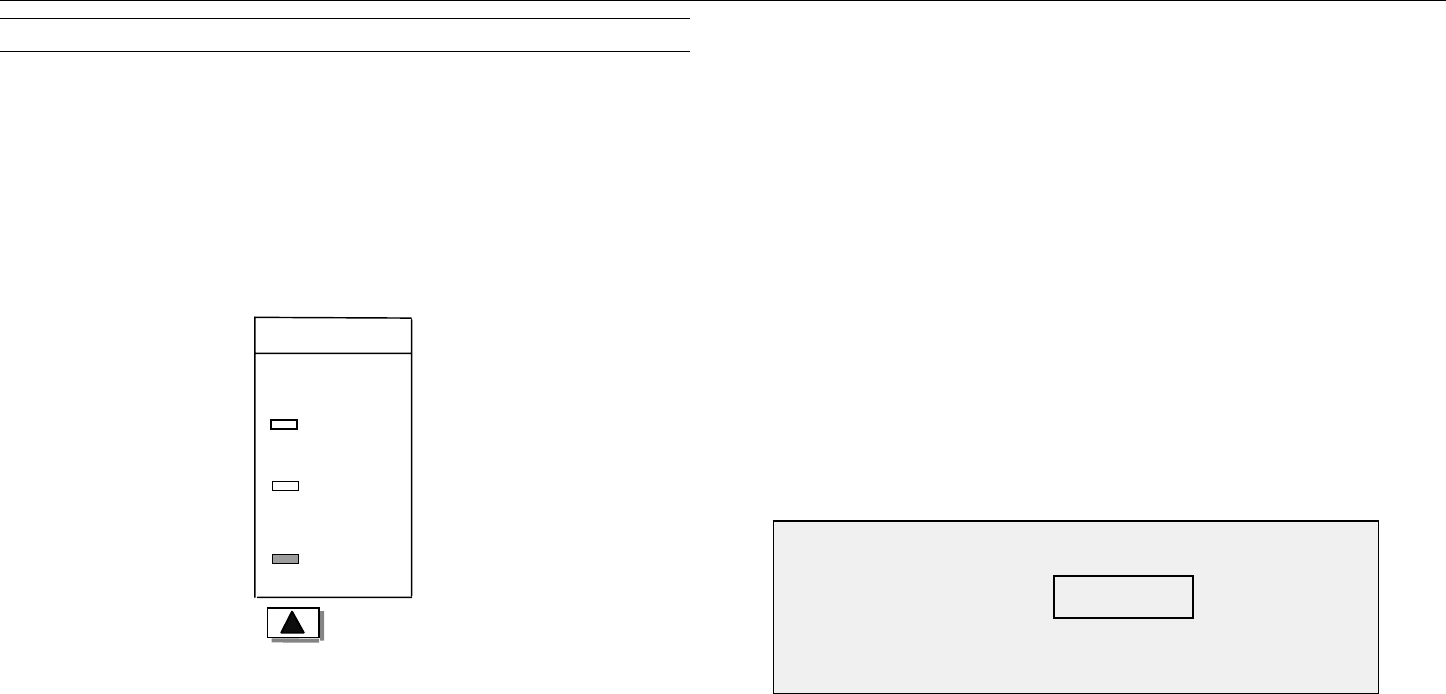
REDUCTION/ENLARGEMENT
The Reduction/Enlargement area of the Scanner Control Panel allows you
to select one of three reduction/enlargement modes – Auto, Manual, and
Preset. The illustration below depicts the Reduction & Enlargement portion
of the Control Panel.
NOTE: Reduction/Enlargement can only be selected in COPY mode.
Auto
Auto automatically adjusts the reduction/enlargement to fit the size of media
selected. To select the Auto mode, press the key beneath
Reduction/Enlargement until the Auto indicator lamp illuminates.
NOTE: The size of the output media must be known in advance for this
feature to operate. Therefore, Auto is not a valid selection if both the Synchro
cut option and the Sheet or Auto media source option are selected. If you
select this combination, an INVALID AUTO COMBINATION status is
displayed.
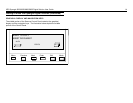
Manual
Manual allows you to reduce the image captured by the Scanner to as little
as 25% or as much as 400% of the original size before the copy is printed.
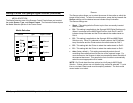
To select the Manual mode:
1. Press the key beneath Reduction/Enlargement until the Manual
indicator lamp illuminates. The MANUAL REDUCTION/ENLARGEMENT
screen is displayed.
NOTE: If the indicator lamp is already lit, press the key once to display the
screen.
2. Enter a reduction/enlargement between 25 and 400. You can select any
value between these limits in 0.1% increments.
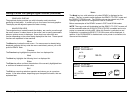
3. Press the Enter key to confirm your choice and return to the READY
screen. The READY screen now displays the new reduction/enlargement
percentage.
NOTE: Pressing the Exit key rejects the choice and retains the previous
setting.
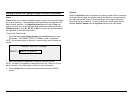
MANUAL REDUCTION/ENLARGEMENT
ENTER (25.0 – 400.0): 100.0%
Reduction/
Enlar
g
ement
Manual
Preset
Auto