


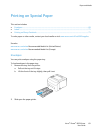


Paper and Media
Xerox
®
Phaser
®
6022 Printer 67
User Guide
7. If the control panel prompts you, on the screen, verify the paper size and type.
a. At the printer control panel, ensure that the displayed paper size matches the paper in the tray.
If correct, press OK.
b. If the displayed paper size does not match the paper in the tray, navigate to the correct paper
size, then press OK.
8. Verify or set the paper size and type.
a. At the printer control panel, press the Menu button.
b. Navigate to Tray Settings, then press OK.
c. Navigate to the desired paper tray, then press OK.
d. Navigate to Tray Mode, then press OK.
e. Navigate to Panel Specified, then press OK.
f. To return to the previous menu, press the Left arrow button.
g. Navigate to Paper Size, then press OK.
h. To select a setting, press the arrow buttons, select it, then press OK.
i. To return to the previous menu, press the Left arrow button.
j. Navigate to Paper Type, then press OK.
Configuring the Paper Tray for Legal and A4
You can adjust the length of the paper tray to accommodate A4/Letter, and Legal (8.5 x 14") paper sizes.
In the Legal length setting, the tray protrudes from the front of the printer.
Changing the Length of the Paper Tray to Match the Paper Length
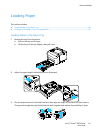
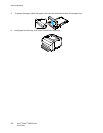
1. Remove all paper from the tray.
2. To remove the tray from the printer, pull out the tray until it stops, lift the front of the tray slightly,
then pull it out.
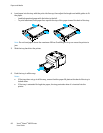
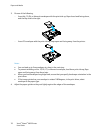
3. To extend the tray, with one hand, hold the back of the tray. With the other hand, at the front of
the tray, press the release latch and pull the ends outward until they latch.
4. To compress the tray for shorter paper, with one hand, hold the back of the tray. With the other
hand, at the front of the tray, press the release latch, then push the ends inward until they latch.