Clearing Paper Jams
Chapter 5: Clearing Jams and Jam Recovery ❖ 5-5
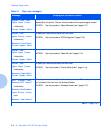
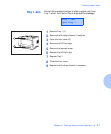
Tray 1 Jam-
Open Tray 1
followed by:
Open Front Cover
Remove Jam Sheet
A paper jam has occurred at or before the printer’s input sensor. The paper was
fed (or intended to be fed) from Tray 1.
ACTION: Use the procedure
“Tray 1 Jam”
(page 5-7).
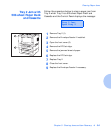
Tray 2 Jam-
Open Tray 2
followed by:
Open Front Cover
Remove Jam Sheet
A paper jam has occurred at or before the printer’s input sensor. The paper was
fed (or intended to be fed) from Tray 2.
ACTION: If a 500-sheet Paper Deck and Cassette is in use as Tray 2, use the
procedure
“Tray 2 Jam with 500-sheet Paper Deck and Cassette”
(page 5-9).
If a 2,000-sheet HCF is in use as Tray 2, use the procedure
“Tray 2 or
Tray 3 Jam with 2,000-sheet HCF”
(page 5-11).
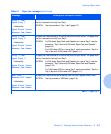
Tray 3 Jam-
Open Tray 3
followed by:
Open Front Cover
Remove Jam Sheet
A paper jam has occurred at or before the printer’s input sensor. The paper was
fed (or intended to be fed) from Tray 3.
ACTION: If a 500-sheet Paper Deck and Cassette is in use as Tray 3, use the
procedure
“Tray 3 Jam with 500-sheet Paper Deck and Cassette”
(page 5-10).
If a 2,000-sheet HCF is in use as Tray 3, use the procedure
“Tray 2 or
Tray 3 Jam with 2,000-sheet HCF”
(page 5-11).
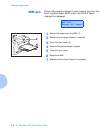
MBF Jam-
Remove All Paper
followed by:
Open Front Cover
Remove Jam Sheet
A paper jam has occurred while feeding from the Multi-bypass Feeder (MBF).
ACTION: Use the procedure
“MBF Jam”
(page 5-8).
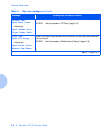
Table 5.1 Paper jam messages
(continued)
Message Description/Corrective Action
Table 5.1 Page 2 of 3


