Printer Configuration
Introduction To Setup
The MtP400 series printers feature an easy to use control panel “Setup” menu system for setting permanent
configuration parameters. These menus offer many useful and necessary features, but are typically only used
when first setting up the printer. They are rarely used in normal everyday operation. The values that are set are
used as the “defaults” whenever the printer is turned on or reset by the host system. Application programs often
send commands that may override any of these values.
As an alternative to using the Setup Menus described below, you may also use the “MtP Setup” remote
configuration utility. This utility runs on a Windows Desktop system and connects to the printer’s serial port.
Setup Basics
LCD Display
Power Indicator
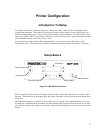
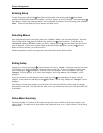
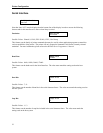
Figure 10 - MtP400 Control Panel
When in Setup, the top line of the LCD Display shows the name of the menu or the name of a “feature” within
the menu. The bottom line of the display shows the current value that is set to be used for the item displayed on
the top line.
The Setup menus operate as a “What You See Is What You Get” system. This means that whenever you view
or change any of the menu choices available, the value showing when you proceed to the next item or exit Setup
is the value the printer will use after you exit Setup. Note that when exiting Setup, you may elect to discard any
changes.
Enter Button
Increment Button
Power Button
Advance Button
15


