21
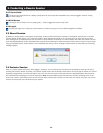
2. Web Configuration Interface
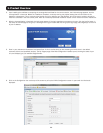
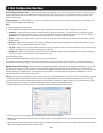
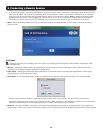
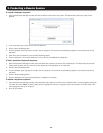
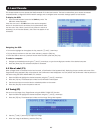
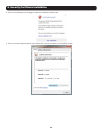
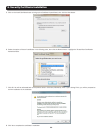
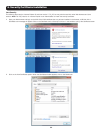
6. WhentheSSLcerticatehasbeeninstalled,apromptappearstoletyouknowtheinstallationwassuccessful,andthattheKVMwillbe
rebooted. Click the OK buttontoexittheWebCongurationInterfaceandreboottheKVM.
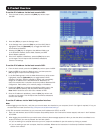
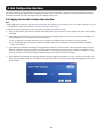
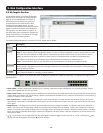
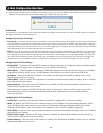
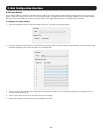
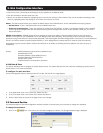
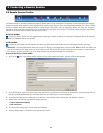
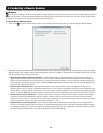
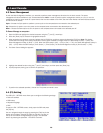
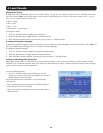
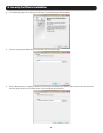
2.4.4 Device
The Device tab in the Configuration sectionallowsadministratorstoconguretheKVM’sDevice ID, LAN, and SNMP settings. The settings in
this page are described in the following section.
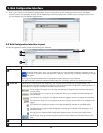
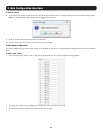
Configuring the Device ID settings:
• Device Name – The Device Name eldallowsyoutoassignanametotheNetCommanderIP.Bydefault,theDevice Name consists of the
letter‘D’followedbya6-digitdevicenumber,whichisprintedonthelabelontheundersideoftheKVM.IftheDHCPserverispublished
intheDNSserver,youcanconnecttotheNetCommanderIPsystemusingthedevicename,asfollows:https://DeviceName.Simplytype
in the desired Device Name and click the Save icon at the top of the page. Upon clicking Save, you will be prompted to reboot the KVM to
finish implementation of the new Device settings. Click Yes to proceed.
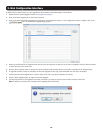
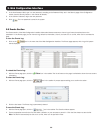
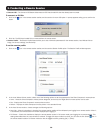
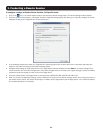
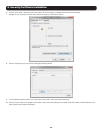
• TCP Port – The TCP Port referstotheportthattheKVM’ssessiondataissentthroughandreceived.Thiseldallowsyoutoselectaport
whichtherewallorroutersecurityaccesslistmustenableinboundtrafcthroughfortheKVM’sIPaddress.Forclientcomputeraccess
fromasecuredLAN,theselectedportshouldbeopenforcommunication.Youcanselectanyportfrom800to65535.ThedefaultTCP
port is 900, and the default https port is 443. Simply type in the desired TCP Port and click the Save icon at the top of the page. Upon
clicking Save, you will be prompted to reboot the KVM to finish implementation of the new Device settings. Click Yes to proceed.
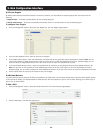
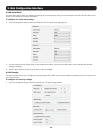
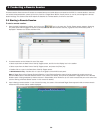
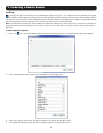
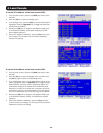
Configuring the IPv4 LAN Settings
•Enable DHCP – By default, the Enable DHCP checkbox is checked, allowing for an IP address to be automatically assigned
byaDHCPserver.ToassignaxedIPaddressofyourown,uncheckthischeckbox.
•MAC Address–TheMACAddresselddisplaystheKVM’sMACaddress,whichcanbeusedwhenlocatingtheIPaddress
assignedtotheKVMbyaDHCPserver.TheMACaddressisalsolocatedonthebottompaneloftheKVMswitch.
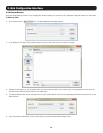
•IP Address–WhentheEnable DHCP checkbox is unchecked, this field becomes available for editing. Enter in an IP
address appropriate for your network.
•Subnet Mask–WhentheEnable DHCP checkbox is unchecked, this field becomes available for editing. Enter in a Subnet
Mask appropriate for your network.
•Default Gateway–WhentheEnable DHCP checkbox is unchecked, this field becomes available for editing. Enter in a
DefaultGatewayappropriateforyournetwork.
•AftermakinganychangestotheKVM’sLANsettings,clickontheSavebuttonatthetopofthescreentosavethem
Upon clicking Save, you will be prompted to reboot the KVM to finish implementation of the new Device settings.
ClickYestoproceed.
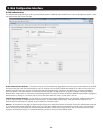
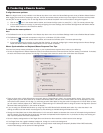
Configuring the IPv6 LAN Settings
•Enable IPv6 – By default, the Enable IPv6 checkbox is checked. To disable IPv6, uncheck this checkbox.
•Mode – By default, the DHCP check box is checked, allowing for an IP address to be automatically assigned by a DHCP
server. The Mode section also provides you the options of automatically assigning a Stateless address and manually
assigning a Static address. Check the checkbox of the method you wish to use for IP address assignment.
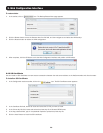
•IPv6 Address–WhentheStatic mode checkbox is checked, this field becomes available for editing. Enter in an IP address
appropriate for your network.
•Subnet Prefix Length–WhentheStatic mode checkbox is checked, this field becomes available for editing. Enter in a
Subnet Prefix Length appropriate for your network.
•Default Gateway–WhentheStatic mode checkbox is checked, this field becomes available for editing. Enter in a Default
Gatewayappropriateforyournetwork.