9
1. Product Overview
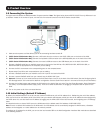
1.9 Connecting the System
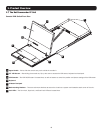
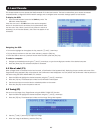
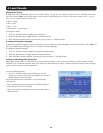
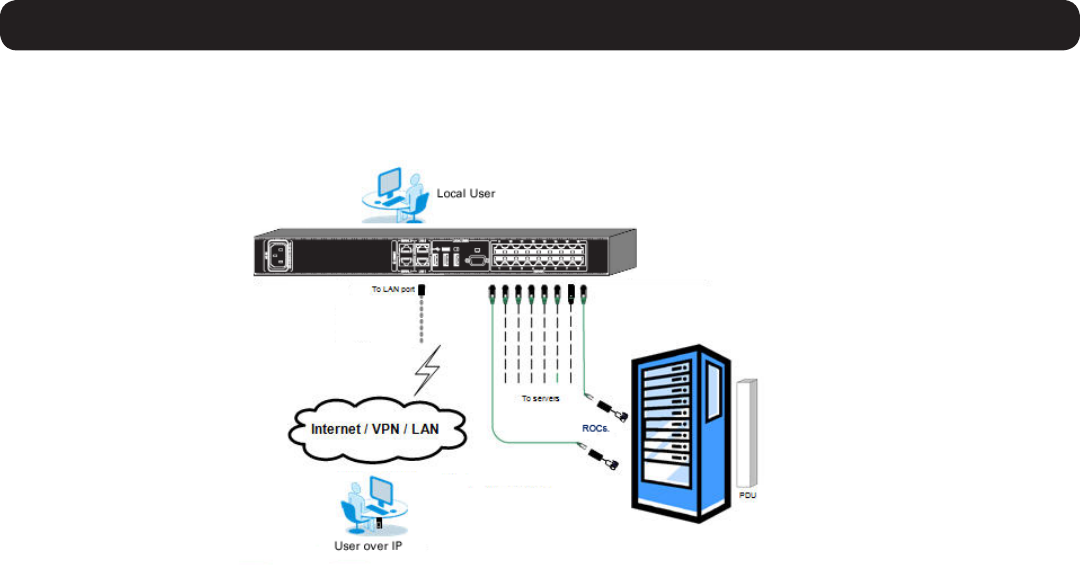
ThegurebelowillustratestheNetCommanderIPsystemoverview.Note: The figure below shows a B072-016-IP. The only difference in set
up between models is the number of ports, and the lack of an external console on the B070-Series console KVMs.
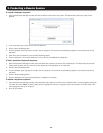
1. Make sure that power to all the devices you will be connecting has been turned off.
2. (B072-Series KVM Switches Only)ConnectaVGAcablefromthemonitortotheHD15(VGA)portonthebackoftheKVM.
3. (B072-Series KVM Switches Only) Connectthekeyboard’sUSBconnectortotheUSBKeyboardportonthebackoftheKVM.
4. (B072-Series KVM Switches Only) Connectthemouse’sUSBconnectortotheUSBMouseportonthebackoftheKVM.
5. ConnectaCat5e/6cablefromanavailableserverportonthebackoftheKVMtoaSIU(B078-101-PS2,B078-101-USB,or
B078-101-USB-1)appropriateforthecomputeryouareadding.
6. ConnecttheSIU’sconnectorstothecorrespondingportsonthecomputer/server.
7. Repeat steps 5 and 6 for each computer/server you are adding.
8. ConnectaCat5e/6cablefromyournetworktotheLAN1portonthebackoftheKVM.
9. ConnectasecondCat5e/6cablefromyournetworkintotheKVM’sLAN2port.
10. Optional: ConnectuptotwoserialdevicestotheRJ45SerialPorts1and2onthebackoftheKVMswitch(SeetheConfiguring Serial
Port Settings section of this manual for details on configuration. See the Serial Pinoutsectioninthismanualforthepinoutinformation).
11. Connect the included power cord between the C14 outlet on the back of the unit and a Tripp Lite Surge Suppressor, Power Distribution
Unit(PDU),orUninterruptiblePowerSupply(UPS).ThereisnoPowerOn/Offswitch,soplugginginthepowercordwillpoweronthe
KVM.
12. Turn on the power to all of the connected devices.
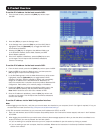
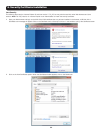
1.10 Initial Settings (Default IP Address)
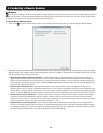
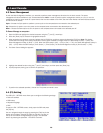
Bydefault,theNetCommanderIPissettohavethenetwork’sDHCPserverpullanIPv4addressforit.Referencingtheunit’sMacaddress,
which can be found on the bottom panel of the KVM, have your network administrator provide you with the IP address that was assigned by
theDHCPserver.YoucanalsoobtaintheIPaddressbyloggingintotheKVM’sOSDviathelocalconsole,andnavigatingtotheF2Settings
menu.
OnnetworksthatdonothaveaDHCPserver,theKVMbootswiththedefaultstaticIPv4addressof192.168.0.254.
Note: There is no default IPv6 address for the KVM switch. An IPv6 address can be automatically assigned via DHCP server, a Stateless
address can be assigned, or a static address can be manually entered.
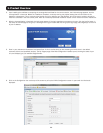
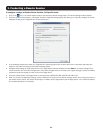
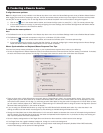
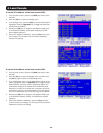
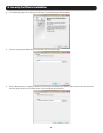
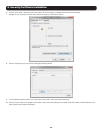
TocongureanIPaddressfortheKVM,youcanusethelocalconsoleOSDortheWebCongurationInterface.Bothmethodsaredescribed
in the following sections.