8
1 2 6 5
3 4 7
1 2-3
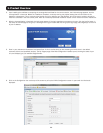
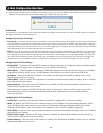
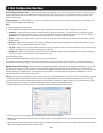
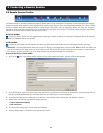
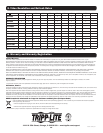
1. Product Overview
1
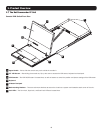
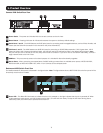
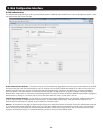
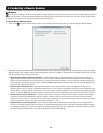
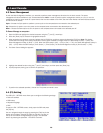
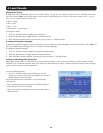
Power Outlet – The power cord included with the KVM connects to the unit here.
2
Reset button – Pressing this button for 10 seconds restores the system to its factory default settings.
3
Serial Ports 1 and 2 – TheKVMfeaturestwoRJ45serialports,forconnectingserialmanageabledevices,suchasPDUs,rewalls,and
routers.(seetheSerialPinoutsectioninthismanualforthepinoutinformation)
4
LAN Ports 1 and 2–TheKVMfeaturestwoRJ45LANportsforconnectingto10/100Mbpsnetworks.IfLAN1goesdown,LAN2
takesover.WhenLAN1becomesoperationalagain,theKVMwillneedtoberebootedtomakeitthedefaultLANportagain.Note:
Only one LAN port can be turned on at a time; they cannot both be turned on. If you don’t wish to use network redundancy, connect a
single network cable to LAN 2 Port.
5
Console KVM ports–AUSBkeyboardandmouse,andVGA(HD15)monitorconnecthereforlocaloperationoftheNetCommanderIP
KVM.
6
USB Port – This port currently serves no functional purpose. It is included for future functionality upgrades.
7
Server ports–Whenconnectingacomputer/server,Cat5e/6cablingconnectsfromanavailableserverporttoa
B078-101-PS2, B078-101-USB, or B078-101-USB-1 SIU, which in turn connects to the computer/server.
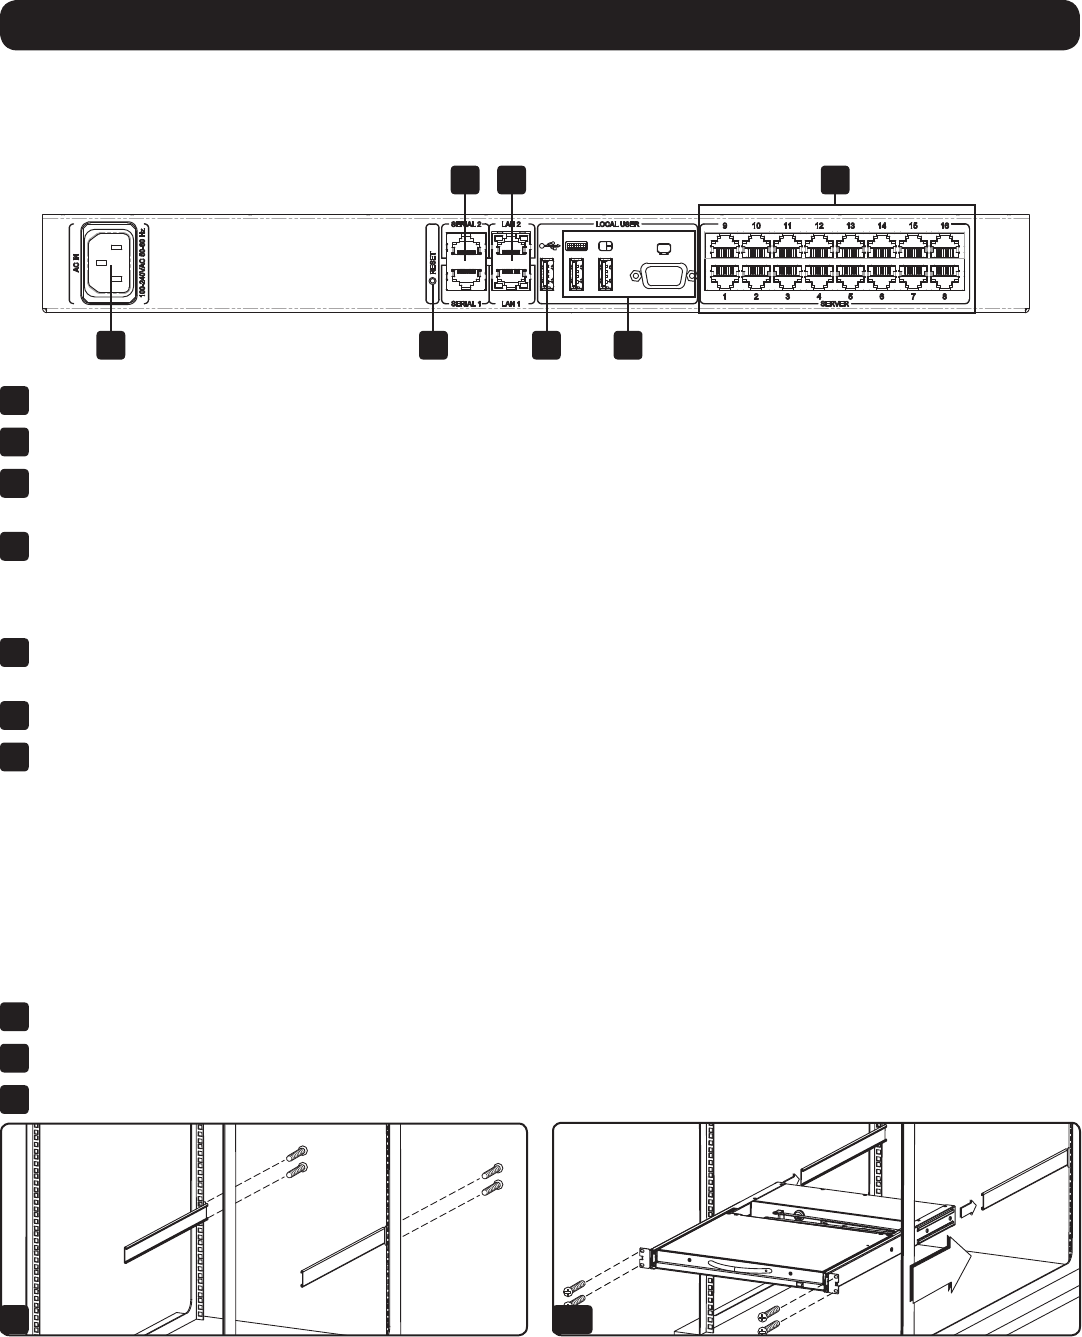
1.8 Rackmounting the NetCommander IP
Follow all instructions in the safety section of this manual before rackmounting. Make sure to write down the MAC Address and Device
Numberfromthebottomoftheunitbeforerackmounting,astheywillbeusefulwhenndingtheIPaddressassignedbytheDHCPserver.
FortheB072-Series,attachtheincludedmountingbracketstothesidesoftheKVMswitch(eitherfrontorrear,dependingonuser
preference)usingtheincludedhardware,andthenmounttheKVMintoyourrackusingusersuppliedscrews.TheB070-SeriesConsoleKVM
Switches come with removable rackmount brackets, allowing the unit to be installed by a single person.
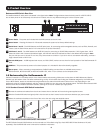
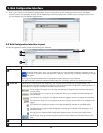
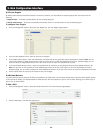
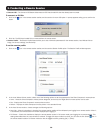
1.8.1 Standard Console KVM Switch Instructions
1
Remove the rackmount brackets from the unit and mount them to the back of the rack using user-supplied screws.
2
Take the Console KVM switch and gently slide it into the rack so that it inserts into the rackmount brackets you just mounted.
3
Mount the rackmount brackets on the front of the unit to the rack using user-supplied screws.
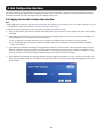
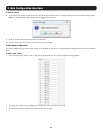
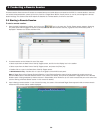
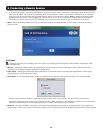
Rackmount KVM Switch Rear View
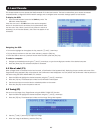
TheNetCommanderIPbackpanelisillustratedinthegurebelow.Note: The figure below shows the back panel for a B072-016-IP,
but the back panel will be functionally the same for all models, with the only difference being the number of server ports.
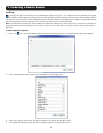
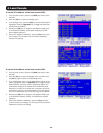
1.8.2 2-Post Rack Console KVM Switch Instructions
TheB070-SeriesConsoleKVMSwitchescanbemountedtoa2-PostRackusingTrippLite’sB019-0002-PostRackmountKit(sold
separately).SeetheB019-000owner’smanualforinstallationinstructions.