


17
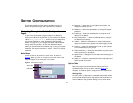
Introduction
The Switch is supplied with two mounting brackets and four
screws. These are used for rack mounting the unit. When
mounting the unit, you should take note of the guidelines given
in “Positioning the Switch” on page 13.
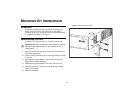
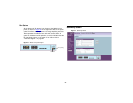
Rack Mounting the Units
The Switch is 1U high and will fit in a standard 19-inch rack.
CAUTION: Disconnect all cables from the unit before continuing.
Remove the self-adhesive pads from the underside of unit, if
already fitted.
1 Place the unit the right way up on a hard, flat surface with the
front facing towards you.
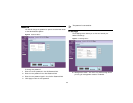
2 Locate a mounting bracket over the mounting holes on one side
of the unit.
3 Insert the two screws supplied in the mounting kit and fully
tighten with a suitable screwdriver.
4 Repeat the two previous steps for the other side of the unit.
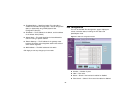
5 Insert the unit into the 19-inch rack and secure with suitable
screws (not provided).
6 Reconnect the cables.
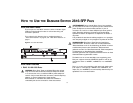
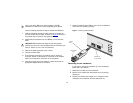
Figure 4 Back Mounting the Units
Baseline Switch 2816-SFPPlus
MOUNTING KIT INSTRUCTIONS