


Viewing Automatically Configured IP Information 43
Most DHCP and BootP servers allow static IP addresses to be configured so that
you know what IP address the switch will be given. Refer to the documentation
that accompanies your DHCP or BootP server.
If your network does not have a DHCP or BootP server, the workstation running
3Com Network Director must be on the same subnet as the switch, because
Auto-IP addresses are non-routable.
Connecting to the
Console Port
Alternatively, you can view the automatically configured IP information using the
command line interface (CLI) through a connection to the console port. (This
example describes a local connection to the console port, rather than a remote
one using a modem.) For further information on connecting using the console
port see
“Connecting the Workstation to the Switch”on page 36.
Viewing IP Information using the Console Port
You are now ready to view the automatically allocated IP information using the
command line interface.
1 Connect your switch to the network using the Ethernet cable. As soon as a
network connection is made the switch begins the automatic IP configuration
process.
The automatic IP configuration process usually completes within one minute.
2 The command line interface login sequence begins as soon as the switch detects a
connection to its console port.
If the login prompt does not begin immediately, press Return a few times until it
starts.
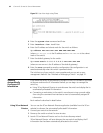
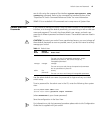
3 At the login and password prompts, enter admin as your user name and press
Return at the password prompt. If you have logged on correctly, <4500G> is
displayed as shown in the example in
Figure 26.
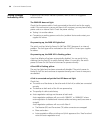
Figure 26 User View Login
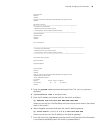
4 Enter display ip interface br to view a summary of allocated IP
addresses.
The initial set up of your switch is now complete and the switch is ready for you to
set up your chosen management method. See
“Methods of Managing a Switch”
on page 31.