


SDR2-USB Configuration Guide rev 1.0 Getting Started
7
NOTE: Your
computer’s Windows
installation may
display different drive
letters, file types, etc.
due to differences in
Windows versions,
configurations, and
software installations.
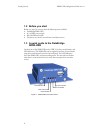
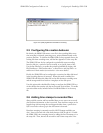
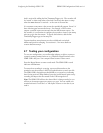
On the rear is the male nine-pin D-subminiature connector (DB9M) for the
data port. The 5 to 30 VDC power input is also located on the rear panel.
5 to 30 VDC Power
From serial data source
Figure 1.2. SDR2-USB Rear Panel.
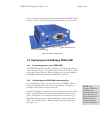
1.4 Deploying the DataBridge SDR2-USB
1.4.1 Connecting power to your SDR2-USB
The SDR2-USB starter kit includes a 120VAC power supply that connects
via the rear panel. If you use an alternate power source, it should be capable
of sourcing at least 1W power. When you apply power the power indicator
should light and the other indicators should flash in sequence.
1.4.2 Configuring your SDR2-USB via the setup file
To successfully receive data from your data source, the SDR2-USB must
know at which baud rate the data source is transmitting. Configure the
recorder for this baud rate using the setup file.
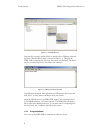
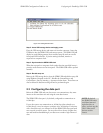
Insert the USB device you intend to use for recording into your PC’s USB
socket. Usually, Windows will respond by displaying the contents of the
device. If this doesn’t occur, navigate to the device’s drive letter (e.g. J:).
Right-click within your drive’s contents in Windows Explorer, then select
“New” and “Text Document.” When prompted, name the file setup.txt
(See Figure 1.3).