Setting up a Network
13
NXR-ZGW/-ZRP
Setting up a Network
After you have established the location of the gateway (page 9), connected it (page 10), provided power
(page 10), and placed the device in either a rack(page 11) or wall installation (page 11) you can then
begin configuring the NXR-ZGW and adding an NXR-ZRP and ZigBee-compatible devices to the
network.
1. Confirm the NXR-ZGW is receiving power by checking the PWR LED (See “Front and Rear
Components of the NXR-ZGW” on page 2.).
2. Using a PC connected to your NetLinx system, navigate to the NXR-ZGW Browser-based
Configuration Manager (See “NXR-ZGW Browser-based Configuration Manager Pages” on
page 15.) in your preferred browser application. The default IP address for the NXR-ZGW is
192.168.1.140.
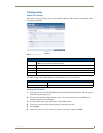
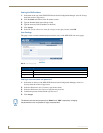
3. Go to the NetLinx setup page and configure the NXR-ZGW to communicate with the master.
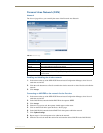
4. Go to the NXR-ZGW Browser-based Configuration Manager PAN page (See “Personal Area
Network (PAN)” on page 19.) and change the PAN ID.
5. Turn on AMX ZigBee-compatible devices one at a time, e.g., Mio R-3, Mio R-4 or NXR-ZRP.
Select the correct new PAN ID.
6. For devices that do not have displays (NXR-ZRP), or not enough display to select the PAN ID to
join a network, place each device one at a time near the gateway, turn one of them on, and configure
it using the gateway web pages before turning on the next one. Then use the PAN pages to change
the devices over to a new PAN ID.
7. This method may also be used if you do not want to go to each ZigBee compatible device to set the
PAN ID; however, once each device is set, the change must be done to the gateway itself. It may be
necessary to cycle power on each device for them to come online.
8. Due to the wireless nature of the ZigBee network, temporary interference (such as leaving a room or
large objects passing between a remote and its gateway device) may prevent a command from
reaching the NetLinx master.
Therefore, programmers should consider setting safeguards for volume control, either established
volume limits or timeouts with the NetLinx master or more interactive adjustment from the remote
(i.e., direct volume control), to prevent issues with lost commands.
If this happens while increasing volume, the master may receive the command to
increase the volume but not the command to stop increasing it.
To maximize the user experience and prevent delays in commands being received
and processed, limiting the number of "hops" between a ZigBee-enabled device and
the NetLinx master to two or less is highly recommended. For more information, see
both the How ZigBee works section on page 5 and the "Getting the Most From Your
Mio Modero R-4" chapter in the Mio Modero R-4 remote user manual, available at
www.amx.com.


