6 AutoView 3050/3100/3200 Switch Installer/User Guide
Rack Mounting an AutoView 3050/3100/3200 Switch
A rack mounting kit is supplied with each AutoView 3050/3100/3200 switch. You may either place
the AutoView 3050/3100/3200 switch on the rack shelf or mount the switch directly into an
Electronic Industries Alliance (EIA) standard rack.
Most AutoView 3050/3100/3200 switches may be rack mounted in a 1U configuration. The
Au
toView 3050/3100/3200 switch family does not support a 0U configuration.
Rack mounting safety considerations
• Rack Loading - Overloading or uneven loading of racks may result in shelf or rack failure,
causing damage to equipment and possible personal injury. Stabilize racks in a permanent
location before loading begins. Mount components beginning at the bottom of the rack, then
work to the top. Do not exceed your rack load rating.
• Power Considerations - Connect only to the power source specified on the unit. When multiple
electrical co
mpon
ents are installed in a rack, ensure that the total component power ratings do
not exceed circuit capabilities. Overloaded power sources and extension cords present fire and
shock hazards.
• Elevated Ambient Temperature: If installed i
n
a closed rack assembly, the operating
temperature of the rack environment may be greater than room ambient. Use care not to exceed
the rated maximum ambient temperature of the switch.
• Reduced Air Flow: Install the equipment in the rack s
o that the amount of airflow required for
safe operation of the equipment is not compromised.
• Reliable Earthing: Maintain reliable earthing of rack mounted equipment. Pay particular
attentio
n to supply connections other than direct connections to the branch circuit (for
example, use of power strips).
To install the rack mounting bracket:
1. Remove the two rack mounting screws from each side of the AutoView 3050/3100/3200
switch.
2
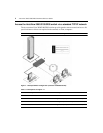
. Place the rack mounting brackets next to the s
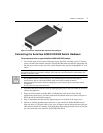
witch as illustrated in Figure 2.2.
3. Insert the screws supplied with the rack mounting kit through the holes of the brackets and into
th
e AutoView 3050/3100/3200 switch. Tighten the screws securely.
4. Install the AutoView 3050/3100/3200 switch into the rack using the method of the rack
manu
facturer.


