


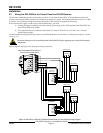


D8125INV
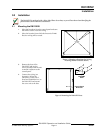
Installation
D8125INV Operation and Installation Guide
49690E Page 18 © 2005 Bosch Security Systems
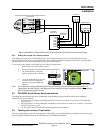
3.6.1.2 Menu 1: Add, Edit or Delete RF Transmitter
This menu is used to add/edit/delete RF transmitters to the D8125INV and to configure them.
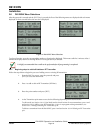
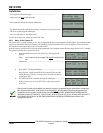
The display for adding, editing or deleting an RF Transmitter is the same.
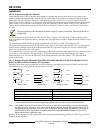
Figure 15 shows an example of the display.
1. The point address of the RF Transmitter.
2. The mode the RF Transmitter is in (see Section 3.6.1.1 Point
Mode, p.17 for more information).
3. The current check-in selection for that specific RF
Transmitter (see Section 3.6.1.3 Adding a new RF Transmitter,
p.18).
Figure 15: RF Transmitter status
4. This line is used to display the key options for this transmitter (see Section 3.6.1.3 Adding a new RF
Transmitter, p.18).
<command scroll> = “Push 1 to edit” displays for 3 seconds, “2 to delete” displays for 3 seconds, “3 to
program” displays for 3 seconds or “ESC to exit” displays for 3 seconds
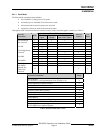
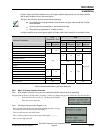
Function Used When… For more information…
Adding new
• adding new transmitter(s)
• programming transmitter(s) and adding to
D8125INV
• to change mode and/or check-in time of
transmitter(s)
Section 3.6.1.3 Adding a new
RF Transmitter, p.18
Adding existing
• adding the point to D8125INV without
reprogramming the transmitter(s)
• replacing the D8125INV without reprogramming
the transmitter(s)
Section 3.6.1.3 Adding an
existing RF Transmitter, p.20
Deleting
• deleting transmitter(s) from the D8125INV
Section 3.6.1.4 Deleting an
RF Transmitter, p.21
Table 7: RF Transmitter options
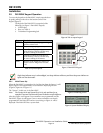
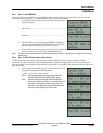
3.6.1.3 Adding a new RF Transmitter
To add an RF transmitter, follow the steps below:
1.
Complete the steps in Section 3.6.1 Beginning steps to add/edit/delete an RF Transmitter, p.16.
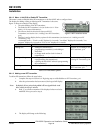
2.
After the point number has been entered, the keypad will display:
Note: By default, all new points being added will be assigned Mode 4 and
have a check-in time of 1 minute.
3.
Push [1] to edit the transmitter if the displayed values need to be
modified. If not, proceed to step 8.
4.
The display will change to the following: