


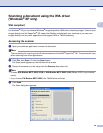


Scanning
25
2
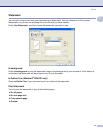
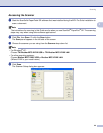
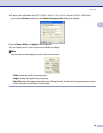
c Click PreScan.
The whole image is scanned into the PC and appears in the Scanning Area (1) of the Scanner Setup
dialog box.
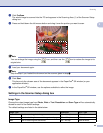
d Press and hold down the left mouse button and drag it over the portion you want to scan.
Note
You can enlarge the image using the icon, and then use the icon to restore the image to its
original size.
e Load your document again.
Note
Skip this step if you loaded the document on the scanner glass in step a.
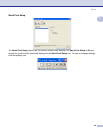
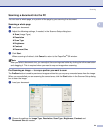
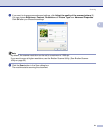
f Click Start.
This time only the chosen area of the document appears in the PaperPort
®
SE window (or your
application window).
g In the PaperPort
®
SE window, use the options available to refine the image.
Settings in the Scanner Setup dialog box 2
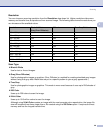
Image Type 2
Choose the output image type from Photo, Web or Text. Resolution and Scan Type will be automatically
altered for each of the default settings.
The default settings are listed in the table below:
Image Type Resolution Scan Type
Photo Use for scanning photo images 300 × 300 dpi 24 bit color
Web Use for attaching the scanned image to web pages 100 × 100 dpi 24 bit color
Text Use for scanning text documents 200 × 200 dpi Black & White