


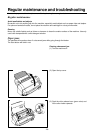
- 22 -
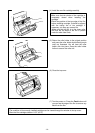
How to define the cutting position
(creating borders)
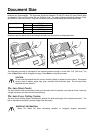
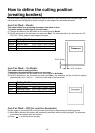
The Auto Cross Cutting System automatically detects the size of your document and cuts each edge. The
cutting position can be adjusted to create a margin on each edge of the laminated document
.
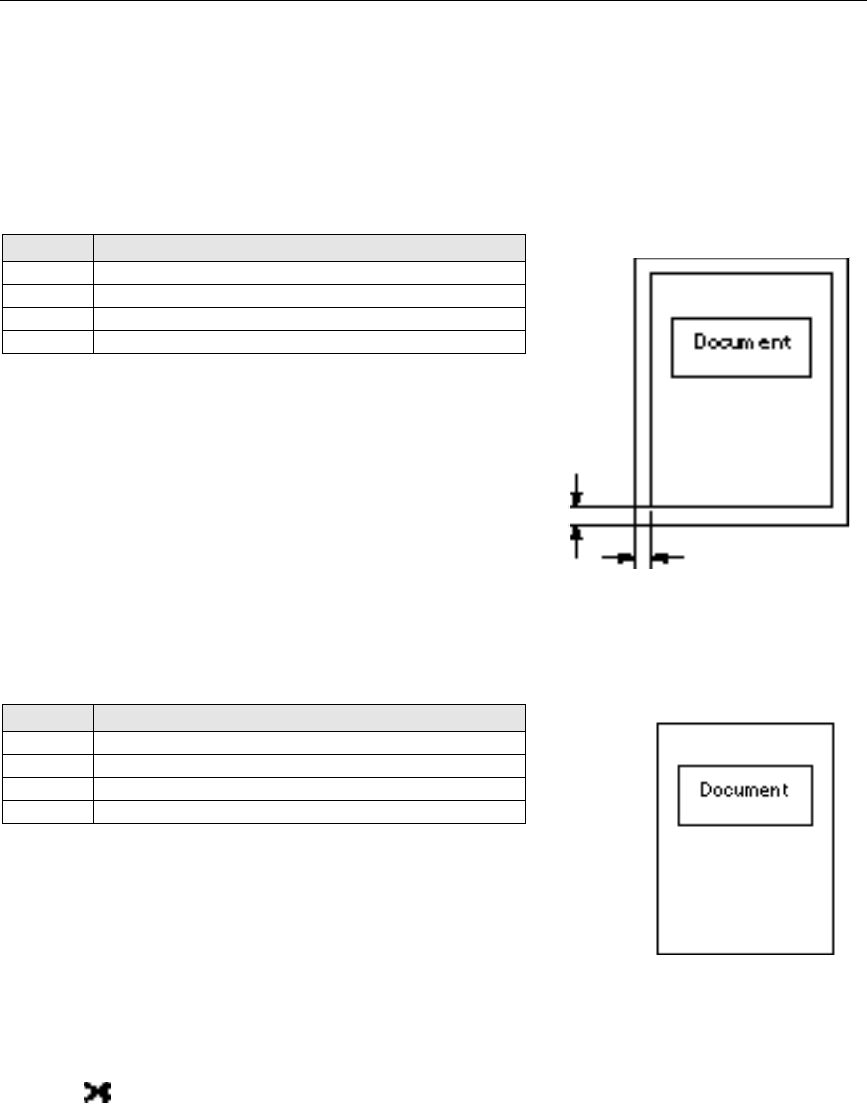
Auto Cut Mode – Border
This mode is ideal for or protecting documents from water or dust.
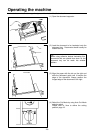
To create a margin on each edge of your document…
(1)
Change the position of the dial switch on the control panel to Border.
(2)
Set the document on the document tray and press Start. The document will be cut with about a 0.18” -
0.20” (4.5 - 5mm) margin on each edge of the paper.
Cutting Position
Top
Top of paper 0.20
”± 0.06” ( 5mm ±1.5mm)
Bottom
Bottom of paper 0.20
”± 0.06” ( 5mm ±1.5mm)
Right
Right edge of paper 0.18
”± 0.06” ( 4.5mm ±1.5mm)
Left
Left edge of paper 0.18
”± 0.06” ( 4.5mm ±1.5mm)
Auto Cut Mode – No Border
This mode is ideal for making stickers.
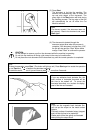
To generate a document without margins on each edge…
(1)
Change the position of the dial switch on the control panel to No Border.
(2)
Set the document on the document tray and press Start. The document will be cut without margins
(approximately 0.04
”- 0.06”or 1 - 1.5mm from each edge of the document).
Cutting Position
Top
Top of paper 0.06
” ± 0.06” (1.5mm ± 1.5 mm)
Bottom
Bottom of paper 0.06
” ± 0.06” (1.5mm ± 1.5 mm)
Right
Right edge of paper 0.04
” ± 0.06” (1mm ± 1.5 mm)
Left
Left edge of paper 0.04
” ± 0.06” (1mm ± 1.5 mm)
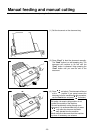
Auto Cut Mode – Off (for sensitive documents)
Use this mode to prevent any part of the document from being cut away during the finishing process.
0.20
”
(
5mm)
0.18
”
(4.5mm)
(1) When Off is selected, the machine will laminate the document without cutting the edges. The document
is processed and ejected from the machine.
(2)
Press to cut the document manually