


2-8 SmartSwitch 9A100 User Guide
Using the Console Switch Installation and Setup
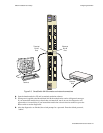
n• Next, the switch prompts for the information necessary to make the switch accessible through your
Ethernet network
U Switch name
U IP address
U Subnet mask
s¥ After you enter these parameters and reboot the switch, log off the local console connection. Perform
additional configuration steps over your network using a telnet connection.
2p›F Only one console connection is allowed at any time. To reach the
SmartSwitch 9A100 through telnet, you must exit the local terminal connection
by entering the exit command.
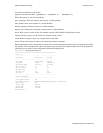
The following is an example of the initial configuration session:
SmartSwitch Version 2.1 (c) Cabletron Inc.
password:: admin
<
¸
admin" is the default password
The current user is Administrator
Could not find setup file
Running Setup Automatically
SwitchName() : My_9A100
< a switch name
IPAddress(0.0.0.0) : 210.160.77.254
< an IP address
IPNetMask(255.0.0.0) : 255.255.255.0
< a subnet mask
Confirm(y/n)?:y
Changing IP Address on System. Telnet session (if any) will be lost.
SmartSwitch #
Before continuing to chapter 3, “IP over ATM and LANE,” read the following sections for information about
U Using the SmartSwitch 9A100 console
U Installing and getting started with the Windows-based SmartSwitch ATM Administrator application
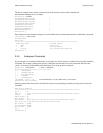
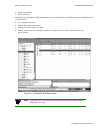
2.5 USING THE CONSOLE
Use the SmartSwitch 9A100 console interface to configure and manage your switch. The following is a description of
the console interface and its operation.
2.5.1 Console Commands
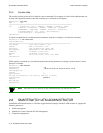
2p›F For detailed descriptions of console commands, see the SmartCell 6A000/ZX-250
Reference Manual.